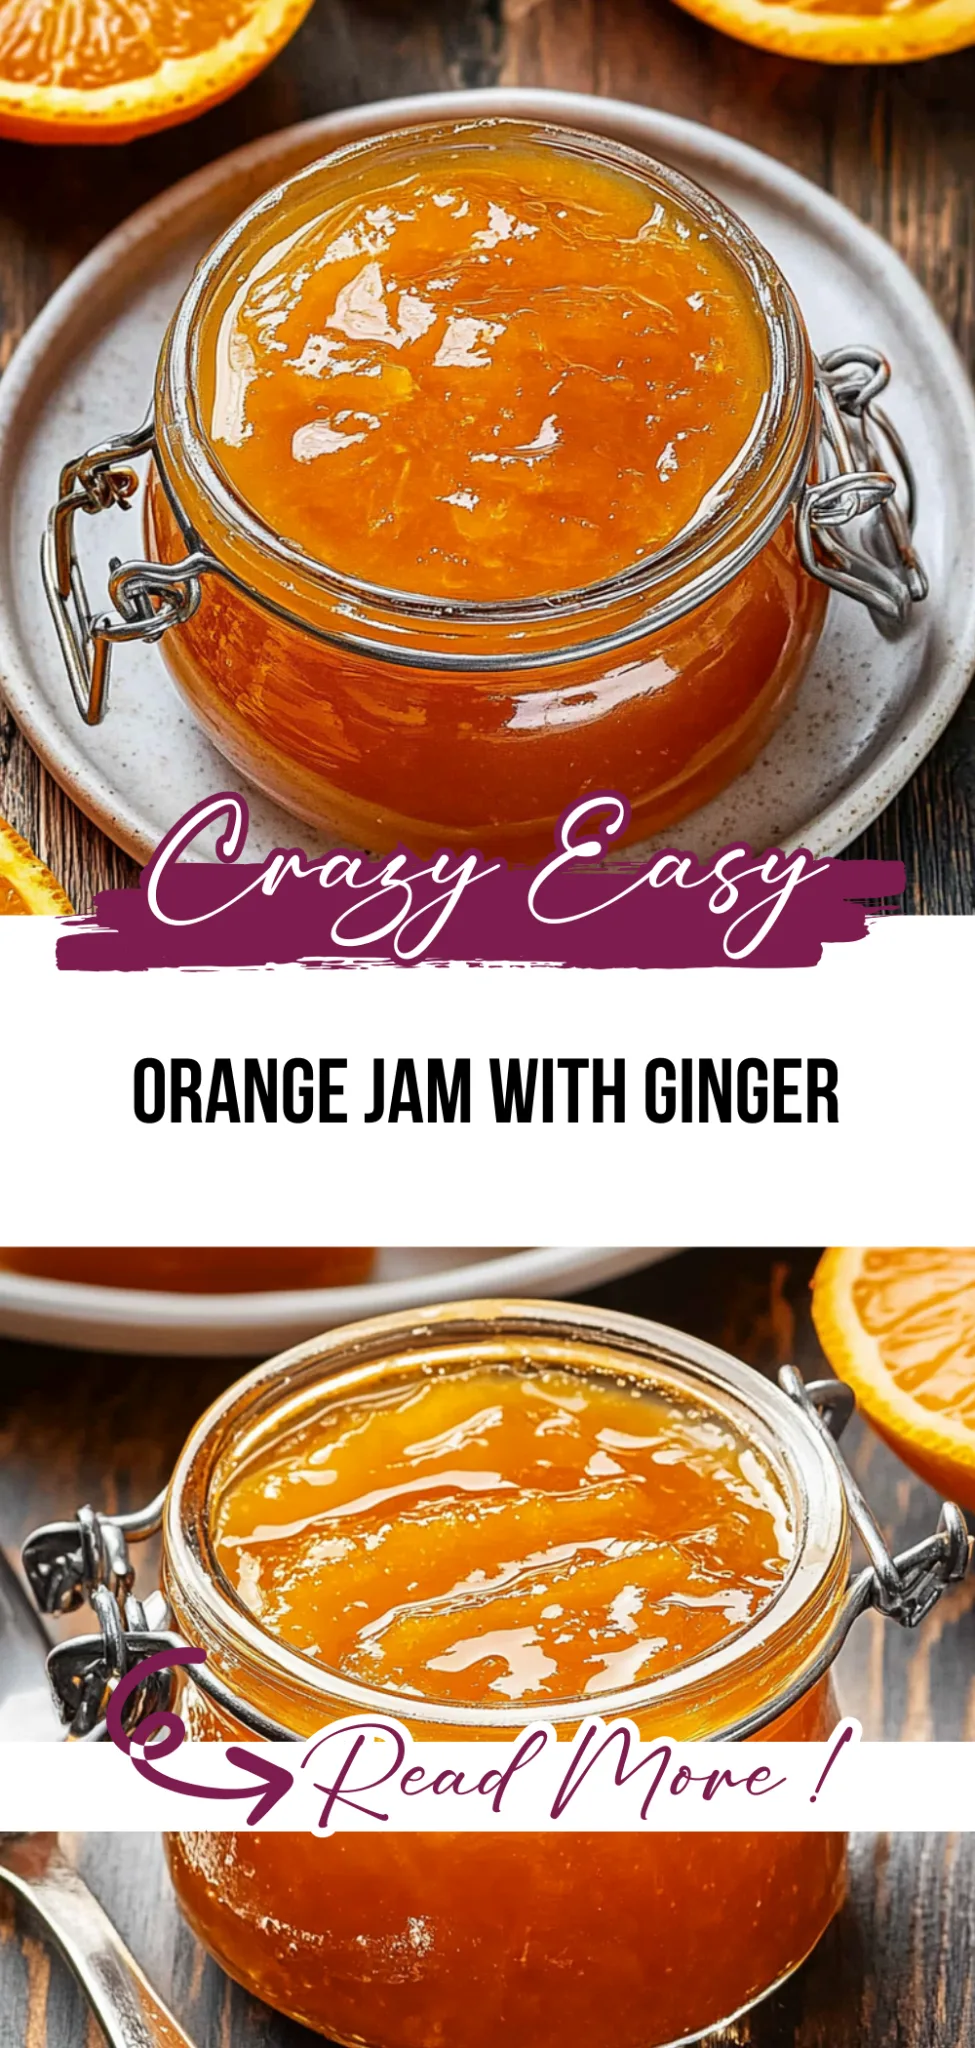
Orange Jam: Sweet Sunshine in a Jar
Sweet Sunshine in a Jar
I remember the first time I made this orange jam; it was a chilly morning, and I was craving something bright and cheerful to spread on my toast. The vibrant orange color and the sweet-tangy aroma filled my kitchen, making the whole experience feel like a warm hug. Honestly, it’s astonishing how easy it is to whip up this delightful treat, transforming simple oranges into something utterly magical.
What truly sets this orange jam apart is the burst of citrus scent that wafts through the air as it simmers away on the stove. Friends and family can’t help but smile when they taste it, making it perfect for cozy breakfasts or even as a charming addition to a brunch gathering. It’s one of those recipes that instantly brings joy, whether you’re enjoying a quiet moment alone or sharing it with loved ones.
Spread it generously over warm buttered toast or swirl it into yogurt for an extra layer of flavor. You might even want to get creative and use it as a topping for desserts like cheesecake or ice cream — the possibilities are endless! I can’t wait for you to experience the sunshine this homemade orange jam brings to your table; let’s get cooking!
What are Orange Jam?
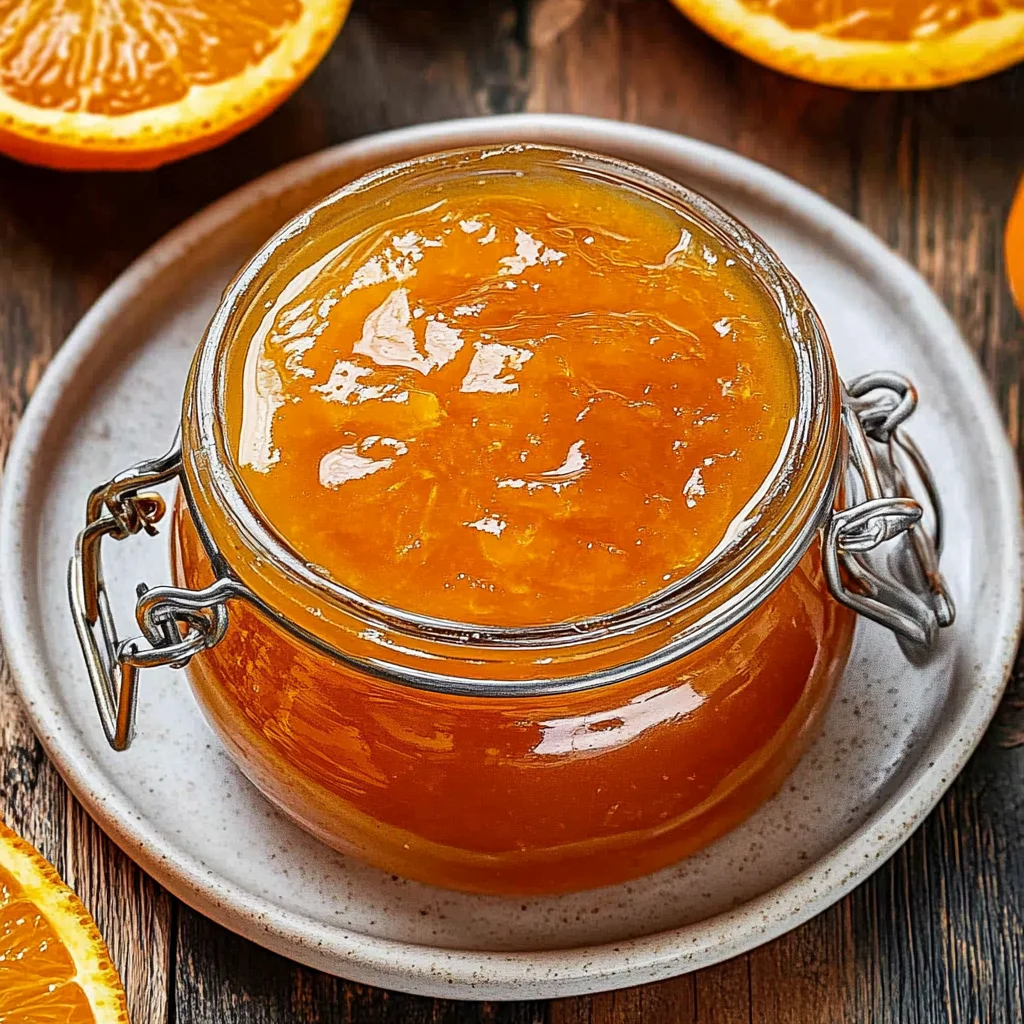
Orange jam is a delightful spread that falls into the category of homemade preserves, offering a sweet and tangy flavor profile that’s perfect for enhancing your breakfast or desserts. This vibrant concoction is crafted from fresh, peeled, and chopped oranges combined with the juice of a medium lemon, creating a bright citrus base. The texture is smooth with a slightly thick consistency thanks to the addition of pectin, while the taste balances sweetness and acidity beautifully. Typically prepared on the stovetop, this simple recipe requires minimal cleanup, making it an ideal choice for those looking to enjoy homemade treats without the hassle.
Perfect For:
Weekend Brunch: This orange jam is a delightful addition to your weekend brunch spread, adding a sweet and tangy twist that pairs beautifully with pancakes and waffles.
Budget-Friendly Treats: Making your own orange jam is a cost-effective way to enjoy gourmet flavors at home, turning simple toast into a luxurious breakfast without breaking the bank.
Family Gatherings: Whether it’s a holiday breakfast or a casual family gathering, this orange jam can easily be scaled up to ensure everyone enjoys the sweet taste of homemade goodness.
Thoughtful Gifts: Jarring this vibrant orange jam makes for an impressive and heartfelt gift—perfect for sharing with friends or bringing along to special occasions like housewarmings or potlucks.
Everything You Need for Orange Jam
For the Fruit
- 4 large oranges (peeled and chopped) – Freshly chopped oranges provide a vibrant flavor that makes this jam sweet and tangy.
- 1 medium lemon (juiced) – The lemon juice adds brightness and helps balance the sweetness of the oranges.
For the Sweetener
- 3 cups granulated sugar (adjust to taste) – The sugar not only sweetens but also helps preserve the jam, making it perfect for spreading.
For the Preserving Agent
- 1 packet pectin (for thickening) – Pectin is essential for achieving that perfect jam consistency, ensuring your Orange Jam sets beautifully.
Kitchen Equipment You’ll Need
- Large pot
- Sharp knife
- Cutting board
- Ladle
- Canning funnel
- Sterilized jars
- Lids
How to Make Orange Jam
Step 1:
Peel and chop the oranges, making sure to remove any seeds as you go. This is an essential step to ensure a smooth texture in your jam. Aim for small, even pieces so they cook evenly and release their natural juices.
Step 2:
In a large pot, combine the chopped oranges with the juice of one medium lemon. The lemon juice adds a delightful tang that balances the sweetness of the oranges. Stir well to mix everything together before moving on to the next step.
Step 3:
Add 3 cups of granulated sugar to the pot and stir until the sugar is completely dissolved. This may take a couple of minutes, but it’s important for achieving that perfect sweet flavor in your jam. You can taste the mixture at this point and adjust the sugar if necessary.
Step 4:
Bring the mixture to a boil over medium heat, stirring frequently to prevent it from sticking or burning. Keep an eye on it, as it will start bubbling vigorously; this is what you want! The boiling should be steady—if it looks like it’s going to overflow, reduce the heat slightly.
Step 5:
Once boiling, add in the packet of pectin and continue boiling for another 10 minutes. You’ll notice that the mixture thickens as it cooks; keep stirring regularly during this time for even consistency.
Step 6:
Remove the pot from heat and allow it to sit for a moment while you skim off any foam that has formed on top. This will help give your jam a clearer appearance and a smoother texture.
Step 7:
Using a ladle and a canning funnel, carefully fill sterilized jars with the hot jam, leaving about 1/4 inch of headspace at the top of each jar. Be cautious here—hot jam can be tricky to handle!
Step 8:
Seal each jar with lids and process them in a boiling water bath for 10 minutes. This step ensures your jam is safely preserved so you can enjoy it later on toast or in delicious desserts!
Tips
- Choose ripe oranges: Select oranges that are firm and heavy for their size. Ripe fruit has more juice and natural sweetness, enhancing the overall flavor of your jam.
- Use fresh lemon juice: Freshly squeezed lemon juice contributes brightness and helps balance the sweetness of the jam. It also aids in preserving the vibrant color and flavor of the orange jam.
- Avoid overcooking: Keep an eye on the boiling process to prevent overcooking, which can lead to a thick, gummy texture. A rolling boil for just 10 minutes after adding pectin is perfect for achieving that ideal consistency.
- Skim off foam carefully: Foam can affect the clarity of your jam and may create an unappealing layer on top. Skimming it off ensures a smooth finish and a more visually appealing jar of jam.
- Leave adequate headspace: When jarring your jam, always leave 1/4 inch of headspace. This space allows for proper sealing during processing and prevents overflow as the jam expands when heated.
- Check seals post-processing: Once cooled, press down in the center of each lid to ensure it’s sealed properly. If it pops back up, the jar isn’t sealed, which means you should refrigerate it and use it soon or reprocess to ensure safety.
Optional Ingredients
- Cream cheese: Stir in softened cream cheese for a luxurious and creamy texture that balances the sweetness of the jam, perfect for spreading on toast or bagels.
- Cayenne pepper: A pinch of cayenne adds a surprising kick, enhancing the jam’s flavor profile with a spicy undertone. Start with just a dash and adjust to your taste!
- Carrot: Finely grated carrot can introduce a subtle earthiness and vibrant color, adding unique depth to your orange jam. Mix in during cooking for a delightful twist.
- Lime zest: Brighten up your jam with zesty lime, which provides a refreshing contrast to the sweetness of the oranges. Add it in during the last few minutes of cooking for an invigorating aroma.
- Honey glaze: Drizzle over your finished jam for an extra layer of sweetness and shine that enhances the overall presentation and flavor experience.
- Toasted almonds: Sprinkle chopped toasted almonds on top before serving for a crunchy texture that contrasts beautifully with the smoothness of the jam.
What to Pair with Orange Jam?
For a refreshing start to your meal, consider serving a light arugula salad topped with goat cheese and candied pecans. The peppery notes of arugula contrast beautifully with the sweet and tangy orange jam, while the creaminess of the goat cheese adds a rich texture that complements the jam’s spreadable consistency. The candied pecans provide a delightful crunch, creating a harmonious balance of flavors that invigorates the palate.
When it comes to comfort sides, buttery toast or freshly baked scones make an ideal pairing with orange jam. The warm, crisp texture of the toast or scones allows the bright citrus notes of the jam to shine through, enhancing each bite. A light dusting of powdered sugar on the scones can elevate this simple treat into something special, marrying sweetness and zest in a delightful way that invites you back for more.
For a drink that beautifully complements your homemade orange jam, consider a sparkling rosé or a ginger-infused iced tea. The effervescence of sparkling wine adds an elegant touch while its fruity undertones echo the flavors in your jam. Alternatively, ginger-infused iced tea offers a spicy kick that balances the sweetness of the jam, making for a refreshing sip that cleanses the palate between bites and rounds out your meal perfectly.
Variations and Substitutions
Grapefruit Jam: Substitute half of the oranges with grapefruit for a slightly bitter, yet refreshing twist. The grapefruit’s unique tanginess pairs beautifully with the sweetness of sugar, creating a complex flavor profile that’s perfect for adventurous palates.
Blood Orange Magic: Use blood oranges instead of regular oranges to give your jam a stunning ruby-red hue and a deeper, more intense flavor. The subtle berry notes in blood oranges will add an exciting twist while still maintaining the classic jam experience.
Lemon Zest Boost: Enhance the citrusy brightness by incorporating the zest of one additional lemon into your mixture. This will amplify the tartness and provide an aromatic quality that complements both the oranges and lemons beautifully.
Honey Sweetener Twist: Replace granulated sugar with honey for a natural sweetener option. Keep in mind that honey will impart its distinct floral notes, resulting in a more nuanced flavor and a slightly softer texture due to its lower glycemic index.
Spiced Citrus Jam: Add a pinch of ground cinnamon or ginger to your mixture while boiling for an aromatic spice twist. This addition will create a warm depth to the jam, making it a delightful spread for cozy breakfasts or desserts.
Mixed Citrus Medley: Experiment by using a combination of different citrus fruits such as mandarins, limes, or tangerines alongside your oranges. Each fruit brings its own unique sweetness and acidity, resulting in a vibrant jam bursting with diverse flavors.
No-Sugar Option: For a healthier alternative, use a sugar substitute like stevia or erythritol in place of sugar. This variation will allow you to enjoy the same sweet-tart flavor without the calories, though you may need to adjust the amount according to taste as different substitutes have varying sweetness levels.
Refrigerate your orange jam in an airtight glass jar or container once it has cooled to room temperature. Properly stored, it will keep in the fridge for up to three weeks. If you find the jam has thickened too much after refrigeration, simply stir in a tablespoon of water while gently reheating it on the stove to restore its spreadable consistency.
Orange jam can be frozen, but be aware that the texture may slightly change after thawing. To freeze, portion the jam into freezer-safe containers or heavy-duty zip-top bags, leaving some space for expansion. It will maintain its best quality for up to a year in the freezer; when you’re ready to use it, thaw it overnight in the refrigerator and reheat gently on the stove if desired.
Frequently Asked Questions
Can I use a different type of fruit to make jam?
Yes, you can substitute other fruits for oranges, such as lemons or grapefruits. Just keep in mind that the sweetness and acidity levels may vary, so you might need to adjust the sugar and lemon juice accordingly.
Is it necessary to use pectin in this orange jam recipe?
While pectin helps achieve a thicker consistency, you can make orange jam without it if you prefer a looser texture. Just remember that cooking the mixture longer will help it thicken naturally, but be cautious not to overcook.
Can I reduce the amount of sugar in this recipe?
Absolutely! You can adjust the sugar to suit your taste preferences. However, be aware that reducing sugar may affect both the flavor and the preservation qualities of the jam, so consider using a lower-sugar pectin if you choose to cut back significantly.
How should I store my homemade orange jam?
Once cooled, store your jars of orange jam in a cool, dark place. If opened, keep it refrigerated and consume within a few weeks. Unopened jars can last up to a year when properly sealed.
Can I make this jam ahead of time for a special occasion?
Yes, you can prepare this orange jam well in advance. Just ensure that you follow proper canning techniques for safe storage, and label your jars with dates for freshness tracking.
What equipment do I need to make this orange jam?
To make this recipe successfully, you’ll need a large pot for cooking, sterilized jars for storing, a ladle and canning funnel for filling the jars, and a boiling water bath setup for processing. Make sure all equipment is clean to ensure food safety.
Can I use store-bought orange juice instead of fresh oranges?
While it’s possible to use store-bought orange juice in a pinch, using fresh oranges will give your jam a much brighter flavor and better texture. Fresh fruit also contains natural pectin that aids in thickening the jam more effectively than juice alone.
Orange Jam
Ingredients
Method
- Peel and chop the oranges, removing any seeds.
- In a large pot, combine the chopped oranges and lemon juice.
- Add the sugar to the pot and stir until dissolved.
- Bring the mixture to a boil over medium heat, stirring frequently.
- Once boiling, add the pectin and continue to boil for 10 minutes.
- Remove the pot from heat and skim off any foam.
- Using a ladle and canning funnel, fill sterilized jars with the hot jam, leaving 1/4 inch headspace.
- Seal the jars with lids and process in a boiling water bath for 10 minutes.