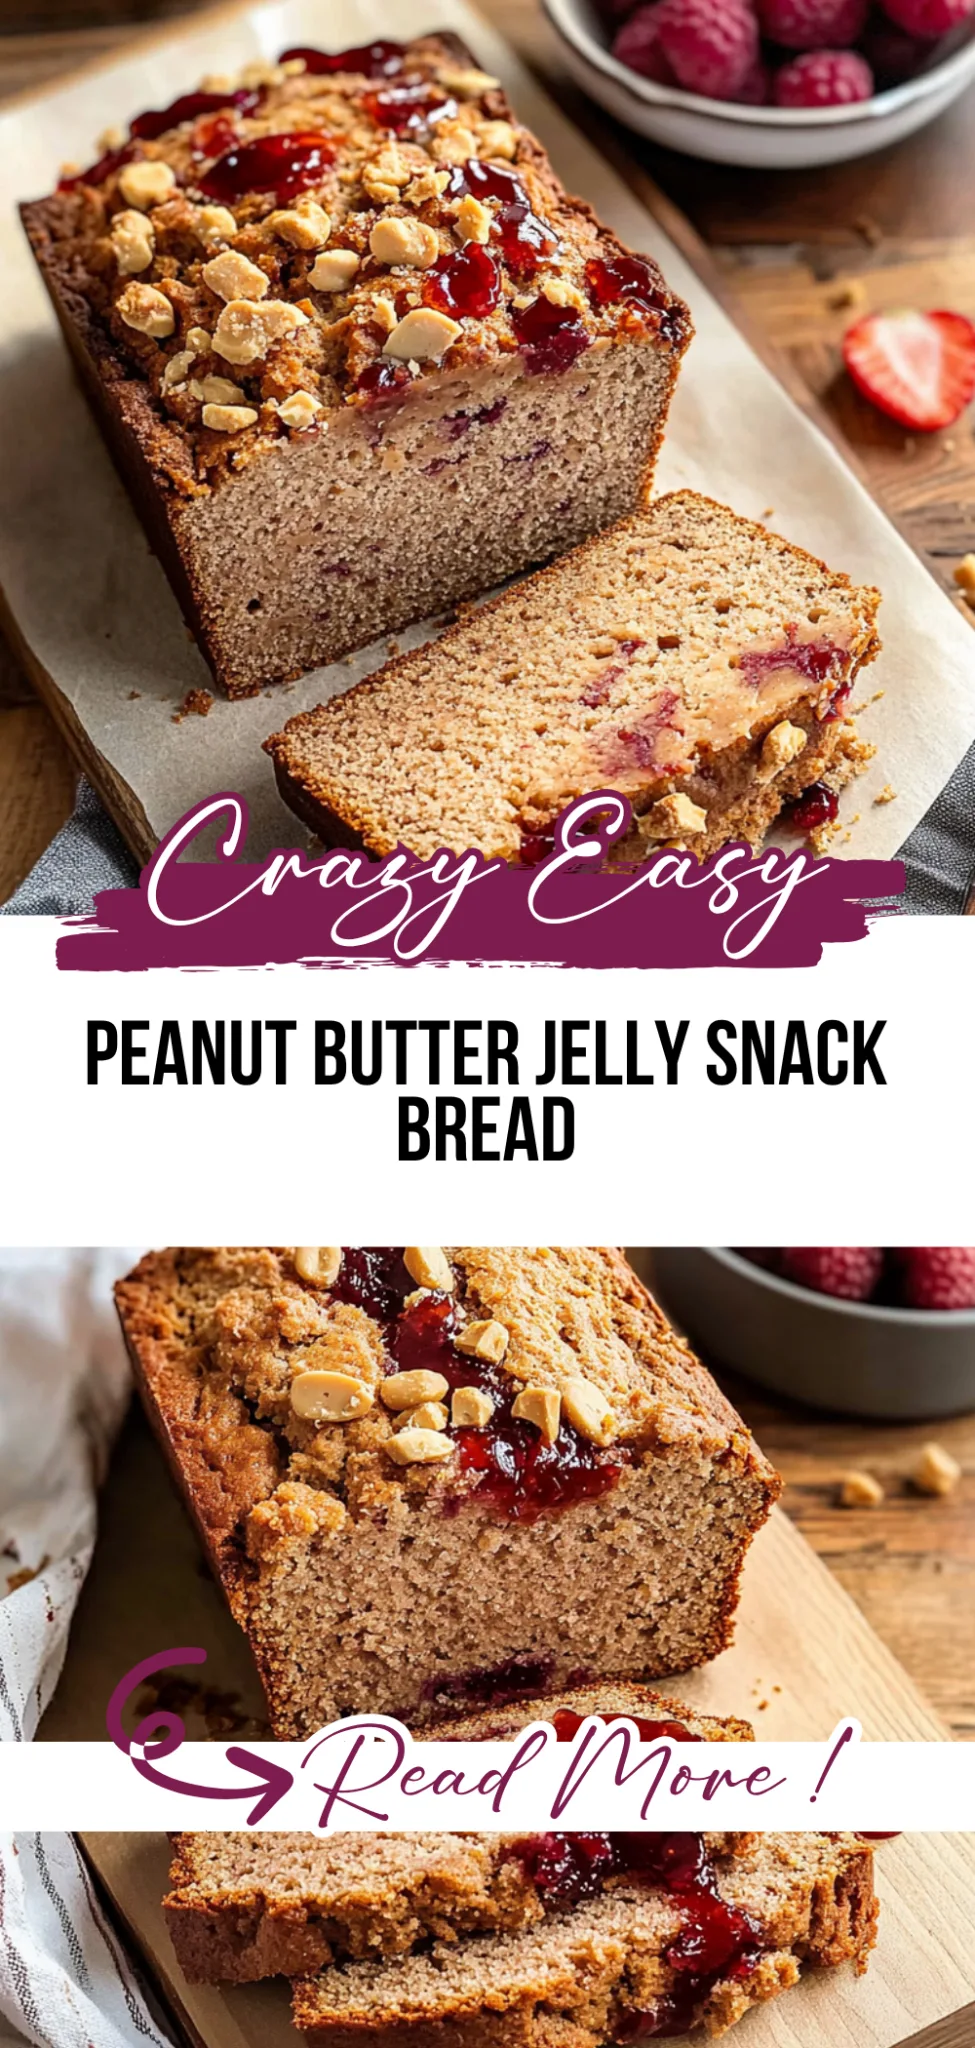
Peanut Butter Jelly Snack Bread: Comforting and Delicious
Sweet, Nutty, and Irresistibly Comforting
I first whipped up this Peanut Butter Jelly Snack Bread on a chilly afternoon when I craved something warm and familiar. The moment it came out of the oven, the rich scent of peanut butter wafted through my kitchen, promising a delightful treat that was as easy to make as it was delicious. Every slice boasts a perfect balance of moistness and flavor, making it hard to resist going back for seconds!
What makes this snack bread truly special is the nostalgia it brings; it’s like wrapping yourself in a cozy blanket of childhood memories. Imagine the delight on your loved ones’ faces as they take their first bite—it’s perfect for casual get-togethers, after-school snacks, or even a comforting breakfast on busy mornings.
For an extra touch, serve it warm with a drizzle of honey or a sprinkle of chopped nuts on top. Whether you enjoy it solo with your morning coffee or share it with friends at an afternoon gathering, this Peanut Butter Jelly Snack Bread is sure to become a cherished favorite in your home. Get ready to create some scrumptious memories!
What are Peanut Butter Jelly Snack Bread?
Peanut Butter Jelly Snack Bread is a delightful twist on traditional quick breads, blending the rich flavors of creamy peanut butter and your favorite jelly into a moist loaf that’s perfect for any occasion. Crafted with essential dry ingredients like all-purpose flour, baking powder, baking soda, and a pinch of salt, this bread boasts a tender crumb that contrasts beautifully with its sweet, nutty taste. The combination of granulated and brown sugars adds a lovely depth of flavor, while the addition of eggs and milk ensures a soft texture throughout. Baked in the oven, this easy-to-make snack bread requires minimal cleanup and effort, making it an ideal choice for both novice bakers and seasoned pros looking to whip up something delicious without the fuss.
Perfect For:
Quick Snacks: This Peanut Butter Jelly Snack Bread is perfect for those busy afternoons when you need a sweet boost, ready to satisfy your cravings in just a few minutes.
Budget-Friendly Treats: Enjoy the classic flavors of peanut butter and jelly without breaking the bank—this recipe uses simple ingredients that won’t stretch your wallet.
Family Gatherings: With its delightful combination of flavors, this moist loaf is sure to please both kids and adults alike, making it an easy crowd-pleaser for family get-togethers.
Cozy Evenings In: There’s nothing quite like enjoying a warm slice of this sweet bread while snuggled up on the couch, making it ideal for those rainy days when comfort food is a must.
Peanut Butter Jelly Snack Bread Ingredients
For the Dry Mix
- 2 cups all-purpose flour – This forms the base of your snack bread, providing structure and texture.
- 1 teaspoon baking powder – Helps the bread rise for a light and fluffy texture.
- 1/2 teaspoon baking soda – Balances acidity and contributes to the bread’s leavening.
- 1/2 teaspoon salt – Enhances the overall flavor of the Peanut Butter Jelly Snack Bread.
For the Batter
- 1/2 cup creamy peanut butter – Adds rich flavor and moisture, making each slice delectable.
- 1/2 cup granulated sugar – Sweetens the bread for that delightful dessert-like quality.
- 1/2 cup brown sugar (packed) – Introduces a hint of caramel flavor while keeping the loaf moist.
- 2 large eggs – Provide structure and stability to your snack bread’s crumb.
- 1/2 cup milk (or non-dairy alternative) – Ensures a moist consistency; almond or oat milk works great too.
- 1 teaspoon vanilla extract – Infuses a warm, inviting aroma that complements the other flavors beautifully.
For the Filling
- 1/2 cup jelly or jam (your choice of flavor) – This sweet layer adds a burst of fruity goodness in every bite!
Kitchen Equipment You’ll Need
- Loaf pan
- Mixing bowls
- Whisk
- Rubber spatula or wooden spoon
- Measuring cups and spoons
- Knife
How to Make Peanut Butter Jelly Snack Bread
Step 1:
Preheat your oven to 350°F (175°C) and grease a loaf pan with butter or non-stick spray. This will ensure that your delicious bread slides out easily once it’s baked.
Step 2:
In a mixing bowl, whisk together the all-purpose flour, baking powder, baking soda, and salt until well combined. This creates your dry ingredient mixture, which is essential for the structure of the bread.
Step 3:
In another bowl, combine the creamy peanut butter, granulated sugar, and brown sugar. Mix these ingredients together until smooth; this will create a rich base for your snack bread.
Step 4:
Next, add the eggs, milk, and vanilla extract to the peanut butter mixture. Whisk everything together until it’s well combined and has a creamy consistency that looks inviting.
Step 5:
Gradually add the dry ingredients to the wet ingredients while stirring gently. Mix until just combined; remember, it’s perfectly fine if there are a few lumps in your batter.
Step 6:
Take care not to overmix your batter; a few lumps are totally okay! This will help keep your bread moist and tender when it bakes.
Step 7:
Pour half of the batter into your prepared loaf pan. Then spoon the jelly over this layer of batter before topping it with the remaining batter. This layering will create delightful pockets of flavor throughout.
Step 8:
Using a knife, gently swirl the jelly into the batter slightly. This adds a lovely marbled effect and ensures that each slice has a hint of jelly goodness.
Step 9:
Bake in your preheated oven for about 45 minutes or until a toothpick inserted into the center comes out clean. You want your bread to be golden brown on top and fragrant—an irresistible sign that it’s almost ready!
Step 10:
Once baked, allow the bread to cool in the pan for about 10 minutes. This initial cooling helps set its shape before you transfer it to a wire rack to cool completely.
Step 11:
Finally, slice up your Peanut Butter Jelly Snack Bread and serve it as a delightful snack or breakfast treat. Enjoy every sweet and nutty bite!
Tips
- Use room temperature ingredients: Bringing your eggs and milk to room temperature helps create a smoother batter, ensuring better incorporation and a more uniform texture in your snack bread.
- Check your baking powder’s freshness: Old baking powder can lead to dense bread. To test it, mix a teaspoon with warm water; if it bubbles vigorously, it’s still good to use!
- Don’t skip the greasing step: Properly greasing your loaf pan prevents the snack bread from sticking, making it easier to remove and ensuring you get those beautiful edges without tearing.
- Swirl the jelly gently: When incorporating the jelly into the batter, use a light hand to avoid overmixing. This preserves the distinct layers and creates a delightful marbled effect.
- Cool completely before slicing: Letting your peanut butter jelly snack bread cool fully allows its structure to set, preventing soggy slices and ensuring clean cuts for perfect presentation.
- Experiment with flavor variations: Try different jelly or jam flavors for unique twists on this recipe. Mixing raspberry with almond butter or strawberry with chocolate peanut butter can elevate your snack bread experience!
Optional Ingredients
- Cream Cheese: Swirl in some softened cream cheese for a rich, tangy contrast to the sweetness, enhancing the overall creaminess of each slice.
- Cayenne Pepper: A pinch of cayenne adds a surprising kick that elevates the flavor profile, making each bite more dynamic and exciting.
- Chopped Bananas: Incorporate mashed or chopped bananas into the batter for added moisture and natural sweetness, creating a delightful fruity twist.
- Lemon Zest: Grate some lemon zest into the mixture to introduce a bright and zesty note that balances the richness of the peanut butter.
- Chocolate Chips: Fold in semi-sweet or dark chocolate chips for a decadent touch that complements the classic flavors beautifully and adds a little indulgence.
What to Pair with Peanut Butter Jelly Snack Bread?
To elevate your Peanut Butter Jelly Snack Bread, consider serving it alongside a fresh salad. A simple arugula salad dressed with a light lemon vinaigrette offers a peppery contrast to the bread’s sweetness. The bright acidity from the dressing not only cuts through the richness of the peanut butter but also refreshes your palate between bites.
Steamed or roasted vegetables can also be a delightful complement to this snack bread. Try pairing it with honey-glazed carrots or roasted Brussels sprouts tossed with a sprinkle of sea salt. The natural sweetness of these veggies harmonizes beautifully with the flavors of the bread, while their tender texture provides a satisfying counterpoint that balances the loaf’s moistness.
For a comforting side, consider serving warm cinnamon apples or buttery corn on the cob. The warmth and slight spice of cinnamon apples enhance the nutty notes of the peanut butter, while sweet corn brings an inviting creaminess that feels like home. This combination creates a cozy meal reminiscent of childhood favorites, making it perfect for sharing with loved ones.
Finally, pair your Peanut Butter Jelly Snack Bread with a creamy vanilla milkshake or an iced coffee. The rich flavors in both drinks complement the loaf’s sweetness and create a nostalgic experience reminiscent of classic diner fare. A cold beverage adds an extra layer of indulgence that perfectly finishes off this delightful snack.
Variations and Substitutions
Whole Wheat Flour Instead: Swap out the all-purpose flour for whole wheat flour to add a nutty flavor and increase the fiber content of your snack bread. This variation yields a heartier loaf that complements the sweetness of the peanut butter and jelly beautifully.
Maple Syrup in Place of Sugar: For a natural sweetener option, replace both granulated and brown sugars with 1 cup of maple syrup. This will impart a rich, caramel-like flavor to your bread while keeping it moist. Just remember to reduce the milk slightly since syrup adds extra liquid.
Coconut Milk Alternative: Use coconut milk instead of regular milk for a tropical twist. This substitution will infuse the bread with a subtle coconut flavor and make it suitable for those who are lactose intolerant or prefer non-dairy options, resulting in a delightfully moist and fragrant loaf.
Almond Butter Twist: Try substituting creamy peanut butter with almond butter for a different nutty taste. Almond butter brings its own unique flavor profile, which pairs wonderfully with fruit jams like raspberry or apricot, creating an exciting variation on the classic recipe.
Chocolate Chips Addition: Enhance the sweetness by mixing in 1/2 cup of chocolate chips into the batter before baking. This addition provides rich bursts of chocolatey flavor that perfectly complement the peanut butter and jelly elements, making each slice even more indulgent.
Chia Seeds for Texture: Add 1/4 cup of chia seeds to the dry ingredients for an extra boost of nutrition and texture. These tiny seeds will absorb moisture and give your snack bread a delightful crunch while also adding omega-3 fatty acids, making it a healthier treat.
Raspberry Jam Variation: Experiment with different types of jelly by using raspberry jam instead of standard grape or strawberry varieties. The tartness of raspberries balances beautifully with the sweetness of peanut butter, giving your snack bread an exciting new flavor dimension that’s sure to impress!
How to Store
To store your Peanut Butter Jelly Snack Bread in the refrigerator, allow it to cool completely, then wrap it tightly in plastic wrap or place it in an airtight container. It will keep well for up to one week. When you’re ready to enjoy a slice, simply reheat it in the microwave for about 15-20 seconds or in a toaster oven until warmed through; this will help restore its moist texture.
This snack bread also freezes well, although the texture may be slightly denser once thawed. To freeze, slice the bread and wrap individual pieces in plastic wrap before placing them in a freezer-safe bag or container. It can be stored frozen for up to three months. To thaw, simply leave the slices at room temperature for a few hours or microwave them on low power, then reheat as desired.
FAQ
Can I use whole wheat flour instead of all-purpose flour for this recipe?
Yes, you can substitute whole wheat flour for all-purpose flour, but keep in mind that it may result in a denser texture. If you choose to use whole wheat flour, consider adding a tablespoon more liquid to the batter to maintain moisture.
What can I use instead of eggs in this recipe?
If you’re looking for an egg substitute, you can use flaxseed meal or chia seeds mixed with water. For each egg, combine 1 tablespoon of flaxseed meal or chia seeds with 2.5 tablespoons of water and let it sit until it thickens before adding it to the wet ingredients.
How can I tell if my Peanut Butter Jelly Snack Bread is done baking?
To check if your bread is done, insert a toothpick into the center—if it comes out clean or with just a few crumbs attached, the bread is ready. If there’s wet batter on the toothpick, bake for an additional 5-10 minutes and check again.
Can I make this bread ahead of time and freeze it?
Absolutely! You can bake the Peanut Butter Jelly Snack Bread and let it cool completely before wrapping it tightly in plastic wrap and aluminum foil. It can be frozen for up to three months; just thaw it at room temperature when you’re ready to enjoy it.
Is there a non-dairy alternative for milk that works well in this recipe?
Yes, you can easily substitute regular milk with almond milk, soy milk, or oat milk. All of these non-dairy options will work just as well without affecting the flavor or texture of your snack bread.
What type of jelly or jam works best in this recipe?
You can use any flavor of jelly or jam that you prefer! Classic options like grape or strawberry are popular choices, but feel free to experiment with other flavors like raspberry or apricot for a unique twist on this snack bread.
Do I need to sift the flour before measuring it?
Sifting is not necessary for this recipe. Simply measure your flour directly into the mixing bowl using the scoop-and-level method to ensure accurate measurements without adding unnecessary airiness.