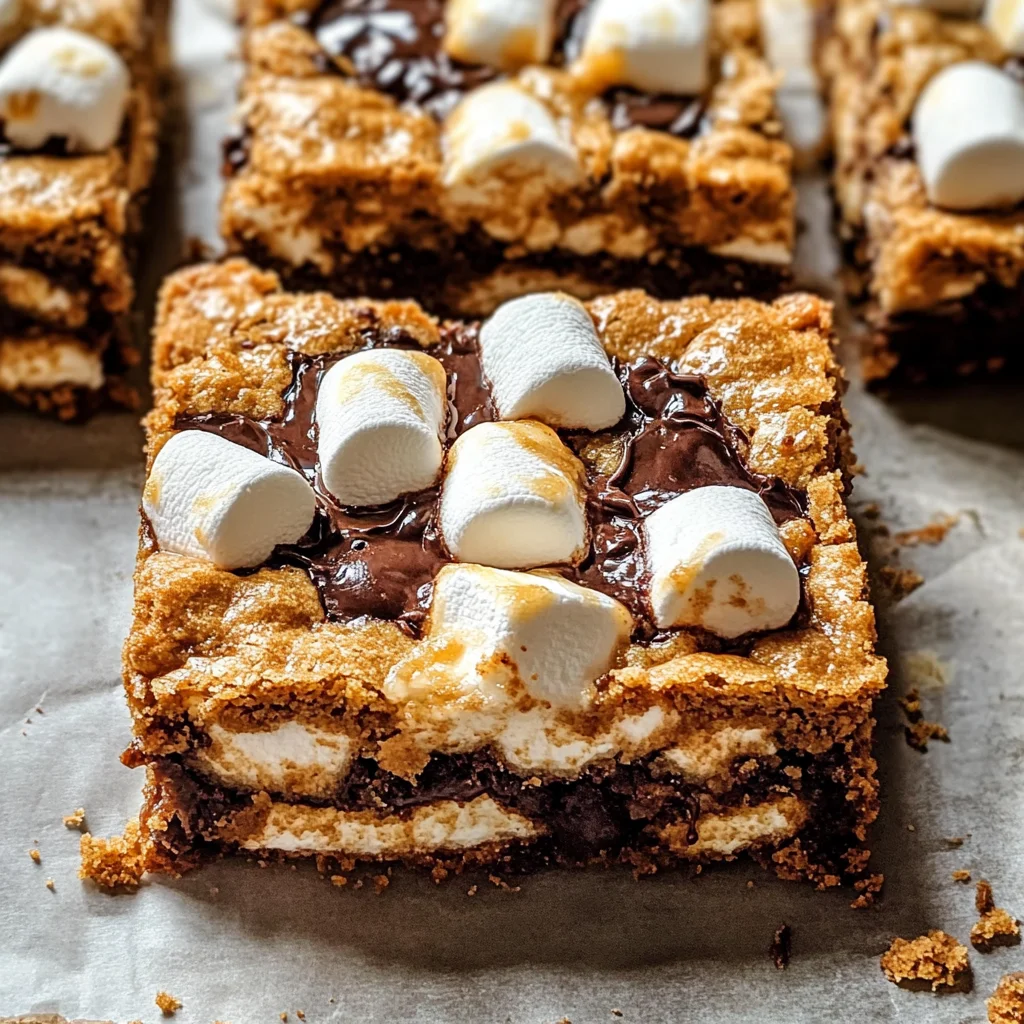
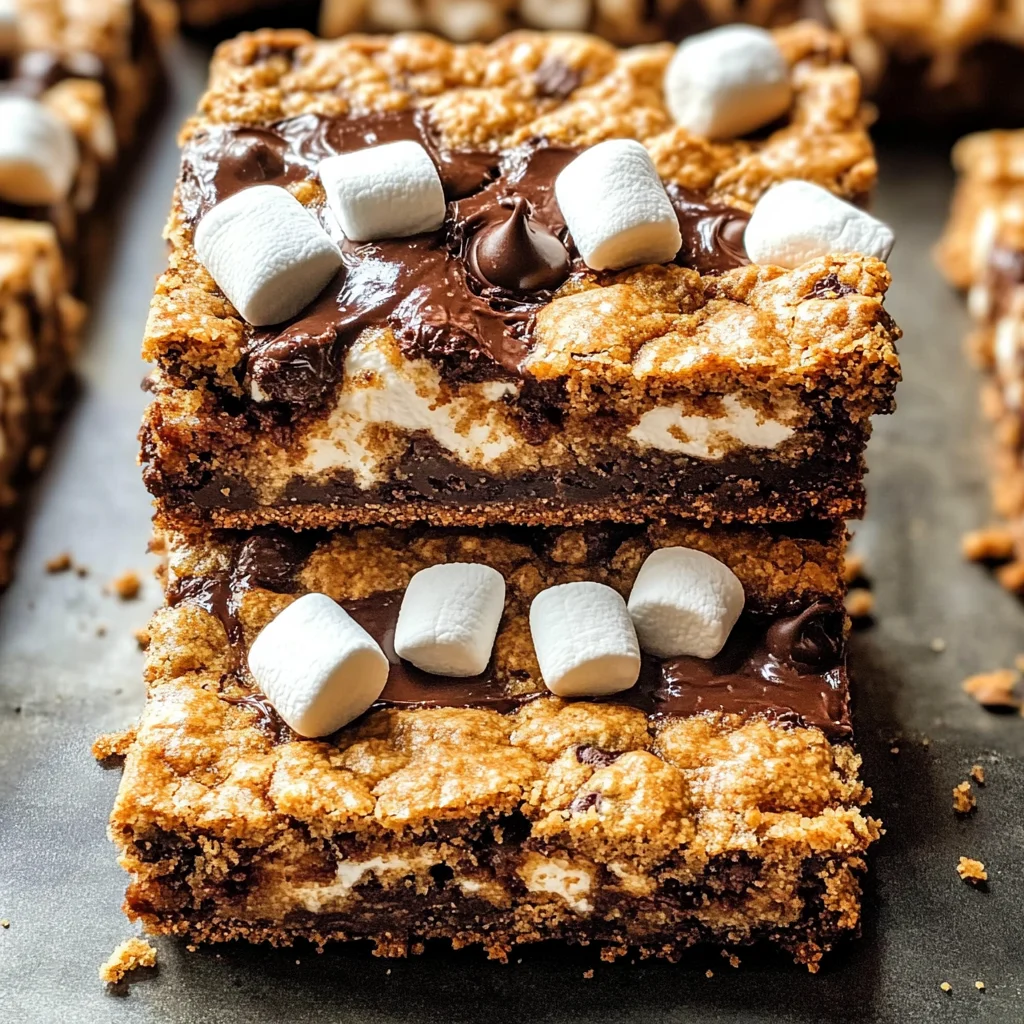
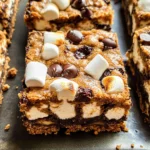
S’more Bars
If you’re looking for a sweet treat that brings back all those cozy campfire memories, then these S’more Bars are just what you need! They capture the essence of classic s’mores without the mess of roasting marshmallows and are perfect for any occasion. Whether it’s a busy weeknight or a family gathering, these bars will quickly become a favorite.
What makes this recipe extra special is its simplicity. With just four ingredients, you can whip up something delicious that everyone will love. Plus, the combination of gooey vegan marshmallows and rich chocolate makes for an indulgent dessert that feels like a warm hug!
Why You’ll Love This Recipe
- Super easy to make: With only a few steps, you’ll have a delightful dessert ready in no time.
- Family-friendly fun: Kids love helping to assemble these bars, making it a great bonding activity.
- Perfect for meal prep: Make them ahead of time and enjoy them throughout the week!
- Decadent flavor: The rich chocolate and toasted marshmallows create an irresistible taste sensation.
Ingredients You’ll Need
These S’more Bars use simple, wholesome ingredients that you probably already have in your pantry. Let’s gather what we need to create this delicious dessert!
For the Base
- 2 cups Graham cracker crumbs
- 1/2 cup Melted butter
For the Topping
- 4 cups Chocolate chips
- 1 package Mini vegan marshmallows
Variations
The beauty of S’more Bars is their flexibility! You can customize them to suit your taste or what you have on hand. Here are some fun variations:
- Add nuts: Toss in some chopped almonds or walnuts for extra crunch.
- Try different chocolates: Use dark chocolate chips or even white chocolate for a unique spin.
- Include peanut butter: Drizzle peanut butter over the marshmallows before baking for a nutty twist.
- Mix in fruits: Add sliced bananas or strawberries between the layers for a fruity surprise!
How to Make S’more Bars
Step 1: Preheat Your Oven
Start by preheating your oven to 350F. This step is crucial because it ensures that your S’more Bars cook evenly and have that lovely golden-brown finish.
Step 2: Prepare Your Pan
Grease a 9×13 inch pan with cooking spray. This will help your bars come out easily after baking, so don’t skip this step!
Step 3: Make the Base
In a mixing bowl, combine the graham cracker crumbs and melted butter. Mix until everything is well combined. Press this mixture firmly into the bottom and sides of your greased pan. This forms the delicious crust that holds everything together!
Step 4: Bake the Base
Pop your pan into the oven and bake for about 8 minutes. This helps set the crust and gives it that perfect crunch before adding all the toppings.
Step 5: Layer on Chocolate Chips and Marshmallows
Once baked, take out your pan and immediately sprinkle the chocolate chips over the crust. Follow this with a generous layer of mini vegan marshmallows. The heat from the crust will start melting those chocolate chips — yum!
Step 6: Bake Again
Return the pan to the oven for another 20 minutes. Keep an eye on it; you’ll know it’s done when the marshmallows turn beautifully brown and fluffy.
Step 7: Cool Down
After baking, let your S’more Bars cool down at room temperature before placing them in the fridge. This cooling process helps them set properly, making it easier to cut into squares later.
Step 8: Slice and Serve
Once cooled completely, cut into squares and serve! These bars are perfect as they are, but feel free to add some extra drizzles of chocolate on top if you’re feeling indulgent! Enjoy every bite!
Pro Tips for Making S’more Bars
Making S’more Bars is a delightful experience, especially when you have a few handy tips to ensure your bars turn out perfectly every time!
- Use high-quality chocolate chips: Opting for premium chocolate will enhance the flavor and overall experience of your S’more Bars. The richness of good chocolate pairs beautifully with the sweetness of marshmallows.
- Don’t skip the cooling step: Allowing your bars to cool completely before cutting is crucial. This helps them set properly and makes it easier to achieve clean, neat slices.
- Experiment with flavor add-ins: Feel free to get creative by adding in ingredients like peanut butter or crushed nuts. These can give your bars an extra layer of flavor and texture that will surprise and delight everyone.
- Press firmly when layering: When you press the graham cracker mixture into the pan, be sure to pack it down tightly. A firm base helps keep the bars together and prevents them from crumbling when you cut them.
- Store properly for freshness: For the best taste and texture, store your S’more Bars in an airtight container at room temperature if you plan to eat them within a few days. If keeping longer, refrigerate them to maintain freshness.
How to Serve S’more Bars
Presenting your S’more Bars in a fun and inviting way can make all the difference! Here are some ideas on how to serve them that will surely impress your family and friends.
Garnishes
- Chocolate drizzle: A simple drizzle of melted chocolate over the top not only looks beautiful but also adds an extra layer of chocolaty goodness.
- Crushed graham crackers: Sprinkling some crushed graham crackers on top before serving adds a nice crunch and enhances that classic S’mores flavor.
Side Dishes
- Fresh fruit salad: A colorful mix of seasonal fruits provides a refreshing contrast to the sweetness of the bars, balancing out their rich flavors.
- Vanilla coconut ice cream: This creamy treat complements the S’more Bars wonderfully while providing a cool, creamy texture that contrasts nicely with their chewy consistency.
- Nut butter dip: Offering a side of nut butter (like almond or cashew) allows guests to spread it on their bars for added richness and protein!
- Homemade whipped coconut cream: Light and airy, this topping brings a delightful creaminess that pairs perfectly with the indulgent flavors of your S’more Bars.
With these tips and serving suggestions, you’re all set to enjoy some delicious S’more Bars that are sure to impress! Happy baking!
Make Ahead and Storage
These S’more Bars are perfect for meal prep, making it easy to whip up a batch in advance. They store well, so you can enjoy them throughout the week or bring them to gatherings!
Storing Leftovers
- Store the cooled S’more Bars in an airtight container at room temperature for up to 3 days.
- For longer freshness, place them in the refrigerator where they can last up to a week.
Freezing
- Cut the S’more Bars into squares before freezing for easier serving.
- Wrap each square tightly in plastic wrap and then place them in a freezer-safe bag or container.
- They can be frozen for up to 3 months.
Reheating
- To enjoy warm S’more Bars, simply preheat your oven to 350°F (175°C).
- Place the bars on a baking sheet and heat for about 10 minutes until warmed through.
- Alternatively, you can microwave individual squares for about 15-20 seconds.
FAQs
Have some questions? You’re not alone! Here are some common queries about S’more Bars that might help.
Can I make S’more Bars without vegan marshmallows?
While vegan marshmallows are recommended for this recipe, you can substitute them with another type of plant-based marshmallow if desired. Just ensure they’re suitable for your dietary needs!
What are some great toppings for S’more Bars?
S’more Bars are delicious as is, but you can add toppings like crushed nuts, drizzled nut butter, or even a sprinkle of sea salt for an extra flavor boost!
How do I know when my S’more Bars are done baking?
You’ll know the bars are done when the vegan marshmallows have turned golden brown on top. This usually takes around 20 minutes of baking time after adding the chocolate chips.
Can I use other types of chocolate in my S’more Bars?
Absolutely! Feel free to experiment with dark chocolate, white chocolate chips, or any dairy-free chocolate alternatives that suit your taste.
Final Thoughts
I hope you find joy in making these delightful S’more Bars! Their simple ingredients and straightforward preparation make them a special treat that’s perfect for sharing with friends and family. Whether you’re enjoying them as a dessert after dinner or as a sweet snack during the day, I’m sure they’ll bring smiles all around. Happy baking!
S’more Bars
Indulge in the ultimate comfort dessert with these delightful S’more Bars! Perfectly capturing the nostalgic essence of campfire s’mores without the fuss of roasting marshmallows, this easy recipe requires just four simple ingredients. These bars feature a golden graham cracker crust topped with gooey vegan marshmallows and rich chocolate chips, creating an irresistible treat for any occasion. Ideal for family gatherings, weeknight desserts, or meal prep, this sweet snack is sure to become a favorite among both kids and adults. Enjoy them as they are or with fun variations for a personalized twist!
- Prep Time: 10 minutes
- Cook Time: 28 minutes
- Total Time: 38 minutes
- Yield: Approximately 12 servings 1x
- Category: Dessert
- Method: Baking
- Cuisine: American
Ingredients
- 2 cups graham cracker crumbs
- 1/2 cup melted butter
- 4 cups chocolate chips
- 1 package mini vegan marshmallows
Instructions
- Preheat your oven to 350°F (175°C).
- Grease a 9×13 inch pan with cooking spray.
- In a bowl, mix graham cracker crumbs and melted butter until combined. Press firmly into the bottom of the prepared pan.
- Bake for 8 minutes to set the crust.
- Remove from oven and sprinkle chocolate chips evenly over the crust, followed by the vegan marshmallows.
- Return to oven and bake for an additional 20 minutes until marshmallows are golden brown.
- Allow to cool at room temperature before slicing into squares.
Nutrition
- Serving Size: 1 bar (50g)
- Calories: 210
- Sugar: 18g
- Sodium: 110mg
- Fat: 10g
- Saturated Fat: 5g
- Unsaturated Fat: 4g
- Trans Fat: 0g
- Carbohydrates: 30g
- Fiber: 1g
- Protein: 2g
- Cholesterol: 0mg