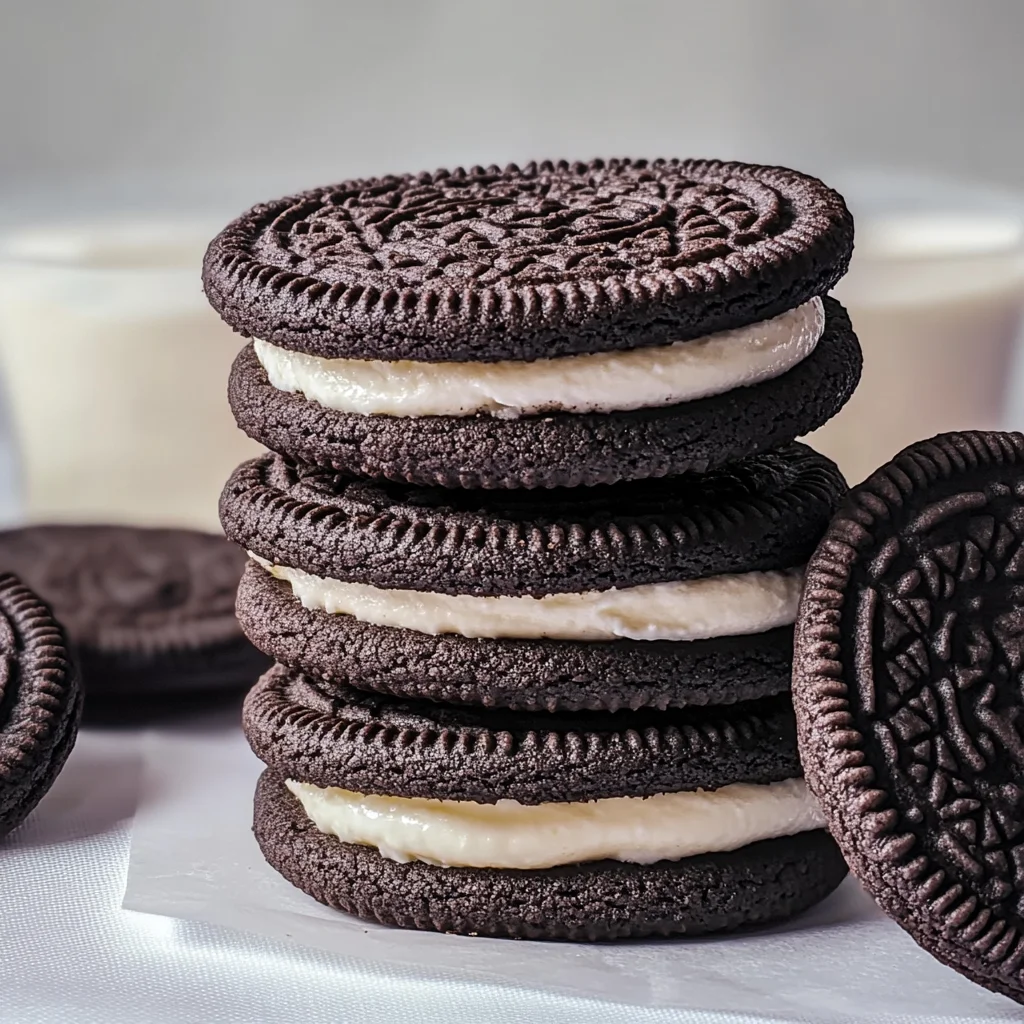
Homemade Oreo Cookies
If you’re looking for a delightful treat that will bring smiles to faces young and old, you’ve come to the right place. Homemade Oreo Cookies are not just any cookies; they are a nostalgic bite of joy that tastes even better than the store-bought version! I remember the first time I made these with my family — the kitchen filled with laughter and the sweet aroma of chocolatey goodness. These cookies are perfect for busy weeknights, family gatherings, or a cozy weekend baking session.
What makes this recipe so special is how easy it is to whip up a batch of these delicious homemade Oreos. Plus, you can customize them with your favorite fillings or even make them double-stuffed if you’re feeling indulgent!
Why You’ll Love This Recipe
- Quick and Easy: With just a few simple steps, you can have fresh cookies in no time!
- Family-Friendly Fun: Kids love helping out in the kitchen, making this a great bonding experience.
- Customizable Flavors: Get creative with different fillings to suit everyone’s taste!
- Make-Ahead Convenience: These cookies store well, letting you enjoy them later on.
- Deliciously Satisfying: Each bite is packed with rich chocolate flavor that will leave you craving more.
Ingredients You’ll Need
Gathering ingredients for these Homemade Oreo Cookies is part of the fun! Thankfully, they require simple and wholesome items that you might already have in your pantry. Here’s what you’ll need:
For the Cookies
- 1 1/4 cups (159 grams) all-purpose flour
- 1/2 cup (43 grams) Dutch-process cocoa powder or Black cocoa powder
- 1 teaspoon baking soda
- 1/4 teaspoon baking powder
- 1/4 teaspoon fine sea salt
- 1 cup (200 grams) granulated sugar
- 10 tablespoons (142 grams) unsalted butter, at cool room temperature, cut into chunks
- 1 large egg, at room temperature
For the Filling
- 1 stick (113 grams) unsalted butter, at cool room temperature
- 2 ½ teaspoons pure vanilla extract
- 2 1/2 cups (313 grams) powdered sugar, sifted
- 1/8 teaspoon fine sea salt
Variations
This recipe is wonderfully flexible! Feel free to mix things up and make it your own. Here are some tasty variation ideas:
- Add Flavor Extracts: Try adding mint or almond extract to the filling for a unique twist!
- Chocolate-Covered Delight: Dip your finished cookies in melted dairy-free chocolate for an extra indulgence.
- Sprinkle Some Magic: Top your filling with colorful sprinkles for a festive look.
- Use Different Fillings: Swap out the classic cream filling for peanut butter or any nut butter of your choice!
How to Make Homemade Oreo Cookies
Step 1: Prepare the Dough
Start by preheating your oven to 350°F (175°C). This ensures that your cookies bake evenly. In a large bowl, whisk together the flour, cocoa powder, baking soda, baking powder, and salt. Mixing these dry ingredients first helps them combine thoroughly.
Step 2: Cream Butter and Sugar
In another bowl, cream together the granulated sugar and unsalted butter until it’s light and fluffy. This step is crucial because it incorporates air into the mixture, making your cookies soft and chewy. Add in the egg and continue mixing until everything is well combined.
Step 3: Combine Wet and Dry Ingredients
Gradually add your dry ingredient mixture into the wet ingredients. Stir until just combined — be careful not to overmix! Overmixing can result in tough cookies instead of that delightful softness we crave.
Step 4: Shape and Bake
Scoop tablespoon-sized portions of dough onto a lined baking sheet. Leave some space between each cookie as they will spread slightly during baking. Bake for about 10 minutes until they are set but still soft in the center.
Step 5: Cool Before Filling
Once baked, let your cookies cool on the baking sheet for a few minutes before transferring them to a wire rack. Cooling is important so they firm up but remain deliciously chewy.
Step 6: Make the Filling
While those beauties are cooling down, prepare your filling. In a medium bowl, beat together the room-temperature butter, vanilla extract, powdered sugar, and salt until smooth and creamy. This luscious filling will take your homemade Oreos to new heights!
Step 7: Assemble Your Cookies
Once cooled completely, turn half of the cookies upside down and spread a generous amount of filling on each one. Top with another cookie half to create delightful sandwich cookies.
And there you have it! Your very own Homemade Oreo Cookies are ready to be enjoyed at home or shared with friends! Happy baking!
Pro Tips for Making Homemade Oreo Cookies
Creating the perfect batch of homemade Oreo cookies is a delightful experience, and with a few pro tips, you’ll be on your way to cookie perfection!
-
Use Room Temperature Ingredients: Ensuring that your butter and egg are at room temperature helps them blend more easily, resulting in a smoother dough that bakes evenly.
-
Sift Your Dry Ingredients: Sifting flour and cocoa powder can help eliminate clumps and ensure an even distribution, leading to better texture in your cookies.
-
Chill the Dough: After mixing, refrigerate the dough for about 30 minutes. This step solidifies the fats in the cookies, helping them maintain their shape while baking.
-
Don’t Overbake: Keep an eye on your cookies in the oven; they should be set but still soft in the middle. They will continue to firm up as they cool.
-
Experiment with Fillings: Feel free to get creative with your filling! You can try different flavors like peppermint extract or almond extract to customize your homemade Oreos to suit your taste.
How to Serve Homemade Oreo Cookies
Homemade Oreo cookies are not just a treat; they can also be presented in charming ways that make them even more enjoyable! Here are a few ideas to serve these delightful cookies.
Garnishes
- Chocolate Drizzle: A simple drizzle of melted dark chocolate adds an elegant touch and enhances the rich chocolate flavor.
- Sprinkles: Colorful sprinkles can bring a playful vibe to your presentation, especially if you’re serving these cookies for a celebration or gathering.
- Mint Leaves: A fresh mint leaf placed beside each cookie adds a pop of color and a refreshing aroma that complements the chocolate perfectly.
Side Dishes
- Milk: The classic pairing with Oreos! Serve chilled milk alongside your cookies for an irresistible combination that brings back childhood memories.
- Vanilla Ice Cream: For an indulgent dessert experience, serve homemade Oreos with a scoop of vanilla ice cream. The contrast of cold ice cream with rich chocolate cookies is simply divine.
- Fruit Salad: A fresh fruit salad can balance out the sweetness of the cookies. Opt for berries or citrus fruits for a refreshing side.
- Coffee or Tea: Enjoying these cookies with a cup of coffee or tea enhances their flavor, making it perfect for afternoon snacks or dessert after dinner.
With these tips and serving suggestions, you’ll create not only delicious homemade Oreo cookies but also memorable moments around your table. Happy baking!
Make Ahead and Storage
These Homemade Oreo Cookies are perfect for meal prep! You can whip up a batch ahead of time, store them, and enjoy them throughout the week or even share them with friends and family.
Storing Leftovers
- Store the Homemade Oreo Cookies in an airtight container at room temperature.
- They will stay fresh for up to 5 days.
- Keep the filling separate if you want to prevent the cookies from getting too soft.
Freezing
- Allow the cookies to cool completely before freezing.
- Place cookies in a single layer on a baking sheet and freeze until solid.
- Once frozen, transfer them to a freezer-safe bag or container. They can be frozen for up to 3 months.
Reheating
- To enjoy your cookies warm, preheat your oven to 350°F (175°C).
- Place the cookies on a baking sheet and heat for about 5-7 minutes.
- Alternatively, you can microwave a cookie for about 10-15 seconds for a warm treat.
FAQs
Here are some common questions about making Homemade Oreo Cookies!
Can I customize the filling for my Homemade Oreo Cookies?
Absolutely! You can mix in flavors like peppermint extract, almond extract, or even add a bit of cocoa powder to make chocolate filling. The possibilities are endless!
How do I ensure my Homemade Oreo Cookies turn out perfectly?
Make sure all your ingredients are at room temperature, especially the butter and egg. Also, don’t overmix the dough; just combine until everything is incorporated for the best texture.
Can I use gluten-free flour for these Homemade Oreo Cookies?
Yes! You can substitute all-purpose flour with a gluten-free blend. Just ensure that it’s designed for baking to maintain the proper texture.
What should I do if my Homemade Oreo Cookies spread too much while baking?
If your cookies spread excessively, try chilling the dough for at least 30 minutes before baking. This helps them hold their shape better in the oven.
Final Thoughts
I hope you have as much fun making these Homemade Oreo Cookies as I did! They’re not only delicious but also customizable to fit your taste preferences. Enjoy sharing them with loved ones or keeping them all to yourself—no judgment here! Happy baking!
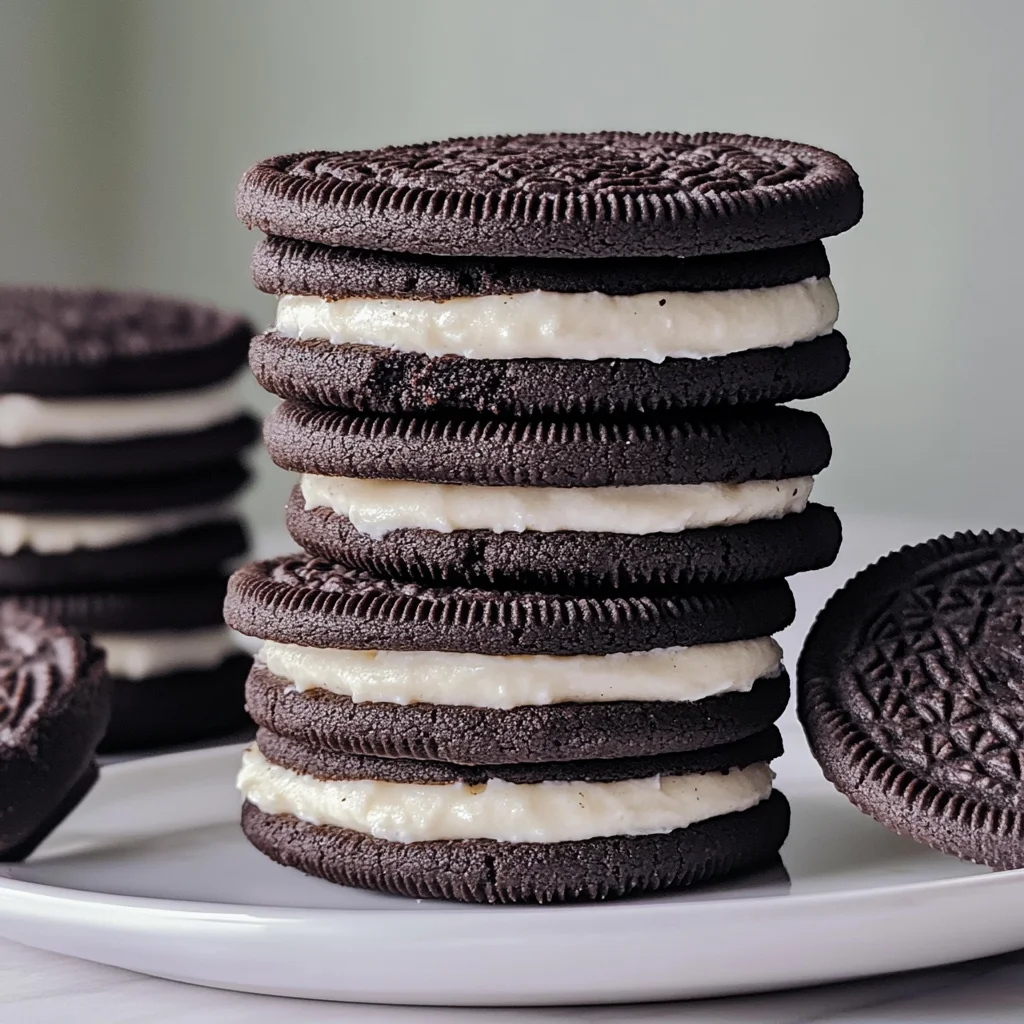
Homemade Oreo Cookies

If you’re in search of a delicious treat that evokes nostalgia and brings joy to both kids and adults, look no further than these Homemade Oreo Cookies. With their rich chocolate flavor and creamy filling, these cookies are a delightful twist on a classic favorite. They’re surprisingly easy to make and perfect for family baking sessions or gatherings with friends. Customize them with different fillings to suit your taste, whether you prefer vanilla, mint, or even nut butter. These delightful sandwich cookies are sure to impress and leave everyone craving more!
- Prep Time: 20 minutes
- Cook Time: 10 minutes
- Total Time: 30 minutes
- Yield: Makes approximately 24 cookies 1x
- Category: Dessert
- Method: Baking
- Cuisine: American
Ingredients
- 1 1/4 cups all-purpose flour
- 1/2 cup Dutch-process cocoa powder
- 1 teaspoon baking soda
- 1/4 teaspoon baking powder
- 1/4 teaspoon fine sea salt
- 1 cup granulated sugar
- 10 tablespoons unsalted butter (room temperature)
- 1 large egg (room temperature)
- For the filling: 1 stick unsalted butter (room temperature), 2 ½ teaspoons pure vanilla extract, 2 1/2 cups powdered sugar, and a pinch of salt.
Instructions
- Preheat oven to 350°F (175°C).
- In a bowl, whisk together flour, cocoa powder, baking soda, baking powder, and salt.
- In another bowl, cream the sugar and butter until light and fluffy. Mix in the egg until combined.
- Gradually add dry ingredients to wet ingredients until just mixed.
- Scoop tablespoon-sized portions onto a lined baking sheet and bake for about 10 minutes.
- Cool cookies before preparing the filling by beating together filling ingredients until smooth.
- Spread filling between two cooled cookies to create sandwich cookies.
Nutrition
- Serving Size: 1 cookie
- Calories: 120
- Sugar: 10g
- Sodium: 40mg
- Fat: 6g
- Saturated Fat: 3g
- Unsaturated Fat: 2g
- Trans Fat: 0g
- Carbohydrates: 16g
- Fiber: 0g
- Protein: 1g
- Cholesterol: 15mg