Buckeye Bars
If you’re looking for a dessert that combines rich flavors and easy preparation, Buckeye Bars are the perfect treat! These bars capture all the joy of the classic Ohio candy balls but in a no-bake square that’s perfect for sharing. Whether you’re hosting a family gathering, celebrating a birthday, or simply need a sweet pick-me-up after a long day, these bars never disappoint. Each bite is filled with creamy peanut butter and smooth chocolate, making them an instant favorite among kids and adults alike.
What makes these Buckeye Bars truly special is how simple they are to make. With just a handful of ingredients, you can whip up this delightful dessert in no time. Plus, they can be made ahead of time—just chill and serve when you’re ready!
Why You’ll Love This Recipe
- Super Easy to Make: With only 15 minutes of prep time, you can enjoy these delicious bars without spending hours in the kitchen.
- Family-Friendly Appeal: Kids adore the sweet peanut butter and chocolate combo, making it a hit at any family gathering.
- No Baking Required: Perfect for hot summer days or busy weeknights when you want something sweet without turning on the oven.
- Make-Ahead Convenience: Prepare ahead of your event or get-together; just let them chill in the fridge until it’s time to serve!
- Rich Flavor Combination: The balance of creamy peanut butter and rich chocolate will satisfy any sweet tooth!
Ingredients You’ll Need
These Buckeye Bars use simple, wholesome ingredients that you might already have in your pantry. Let’s gather everything we need to bring this delicious treat to life!
For the Peanut Butter Layer
- 8 tablespoons salted sweet cream butter (softened)
- 3 cups creamy peanut butter
- 4 cups powdered sugar
- 2 teaspoons pure vanilla extract
For the Chocolate Topping
- 12 ounce package semi-sweet chocolate chips
- 2 tablespoons vegetable oil
Variations
The beauty of Buckeye Bars is their flexibility! Feel free to get creative and personalize them with these fun variations:
- Add Some Crunch: Mix in chopped nuts or crushed pretzels into the peanut butter layer for an extra texture.
- Go Darker: Use dark chocolate chips instead of semi-sweet for a richer chocolate flavor.
- Flavor Twist: Try adding a sprinkle of sea salt on top for an added burst of flavor.
- Make Them Vegan: Substitute dairy-free butter and chocolate chips to create a vegan-friendly version!
How to Make Buckeye Bars
Step 1: Prepare the Peanut Butter Layer
Start by mixing together the softened butter, creamy peanut butter, powdered sugar, and vanilla extract in a large mixing bowl. It’s important to blend thoroughly until smooth because this will form the base layer that gives your bars their delightful flavor.
Step 2: Spread the Mixture
Once your peanut butter mixture is well combined, spread it evenly into a greased 9×13 inch pan. Press down firmly but gently—this helps create a solid base that holds together once set.
Step 3: Melt the Chocolate
In a microwave-safe bowl, combine the semi-sweet chocolate chips and vegetable oil. Heat in short bursts of 30 seconds, stirring between each interval until melted and smooth. The oil helps make your chocolate glossy and easier to spread.
Step 4: Top with Chocolate
Pour the melted chocolate over your cooled peanut butter layer. Use a spatula to spread it evenly across the surface. This step is crucial as it seals in that rich flavor we love so much!
Step 5: Chill Until Set
Cover your pan with plastic wrap or foil and refrigerate for at least two hours or until firm. Chilling allows all those delicious flavors to meld together perfectly.
Step 6: Slice and Serve
Once set, cut into squares and serve! These are great for sharing at parties or enjoying as an afternoon snack. Just remember to keep some for yourself—you’ll want seconds!
Pro Tips for Making Buckeye Bars
Making Buckeye Bars is a breeze, and with these simple tips, you’ll ensure your bars turn out perfectly every time!
- Use room temperature ingredients: Softened butter and peanut butter blend more easily, resulting in a smooth filling that sets beautifully.
- Chill for the best texture: Allow your bars to chill for at least two hours before slicing. This helps them hold their shape and makes cutting easier.
- Opt for high-quality chocolate chips: A good quality semi-sweet chocolate will melt better and provide a richer flavor that enhances the overall taste of your bars.
- Experiment with toppings: Consider sprinkling some sea salt or crushed nuts on top of the chocolate layer for added texture and flavor.
- Keep it neat: Use parchment paper to line your baking dish. This makes it easy to lift out the bars for clean cuts and serving.
How to Serve Buckeye Bars
Serving Buckeye Bars can be just as delightful as making them! Here are some ideas to make your dessert presentation shine.
Garnishes
- Chopped peanuts: Sprinkle chopped roasted peanuts on top of the chocolate layer for an extra crunch that complements the creamy filling.
- Drizzle of melted chocolate: Add a decorative drizzle of melted chocolate over the bars just before serving for a gorgeous finish.
Side Dishes
- Fresh fruit salad: A vibrant fruit salad adds a refreshing contrast to the richness of the bars. Think berries, melons, and citrus!
- Vanilla coconut ice cream: The creaminess of coconut ice cream pairs well with the chocolatey peanut butter flavors while providing a cool treat.
- Coffee or espresso: A warm cup of coffee or espresso balances the sweetness of the bars and brings out their rich flavors beautifully.
- Milk or plant-based milk: A classic pairing! Serve with cold milk (dairy or non-dairy) to complement every decadent bite.
Enjoy sharing these delicious Buckeye Bars with friends and family, or keep them all to yourself—no judgment here!
Make Ahead and Storage
These Buckeye Bars are perfect for meal prep, making them a delightful treat to have on hand during busy weeks! You can whip up a batch and store them for later, ensuring you always have a sweet indulgence ready to share or enjoy solo.
Storing Leftovers
- Store any leftover bars in an airtight container.
- Keep them in the refrigerator for up to one week.
- For best flavor, let them sit at room temperature for about 10 minutes before serving.
Freezing
- Wrap individual bars tightly in plastic wrap or aluminum foil.
- Place wrapped bars in a freezer-safe container or bag.
- They can be frozen for up to three months; just thaw in the fridge overnight before enjoying.
Reheating
- These bars are best served chilled or at room temperature.
- If you’d like them slightly softened, leave them out for about 15 minutes before serving.
- Avoid using a microwave, as it can alter their texture.
FAQs
Here are some common questions you might have about making Buckeye Bars!
Can I make Buckeye Bars without powdered sugar?
Yes, you can use alternative sweeteners like erythritol or coconut sugar, but the texture and sweetness may vary.
What is the best way to cut Buckeye Bars?
To achieve clean cuts, chill the bars until firm and use a sharp knife dipped in warm water. Wipe the knife between cuts for neat edges!
Are Buckeye Bars gluten-free?
Absolutely! This recipe is naturally gluten-free as it uses no flour.
How long do Buckeye Bars last?
When stored properly in the refrigerator, Buckeye Bars can last up to one week. They also freeze well for longer storage!
Can I substitute ingredients in Buckeye Bars?
You can experiment with nut butters like almond or cashew butter; however, alterations may affect the final taste and texture.
Final Thoughts
I hope you find joy in making these delicious Buckeye Bars! They capture all the scrumptiousness of traditional buckeyes but are so much easier to share. Whether it’s a family gathering or just a treat for yourself, these bars are sure to bring smiles. Enjoy every bite and happy baking!
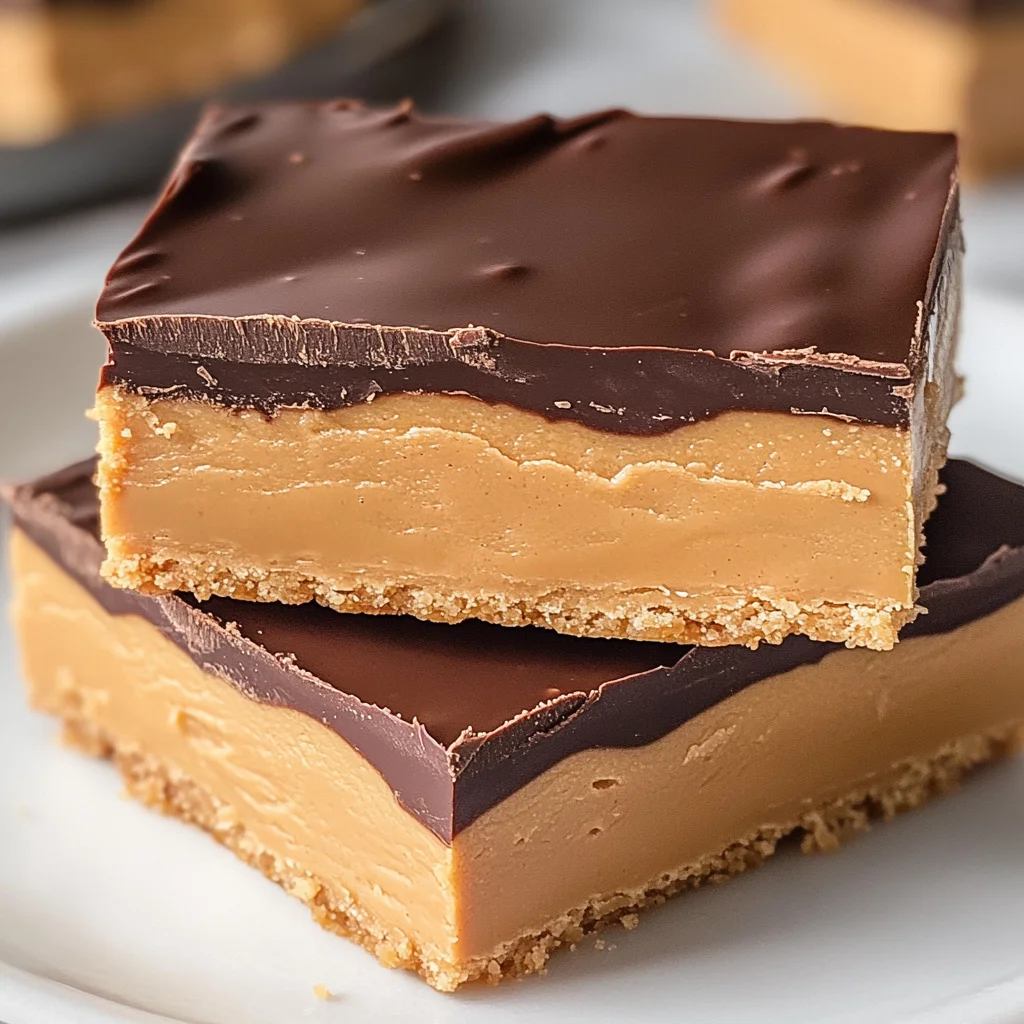
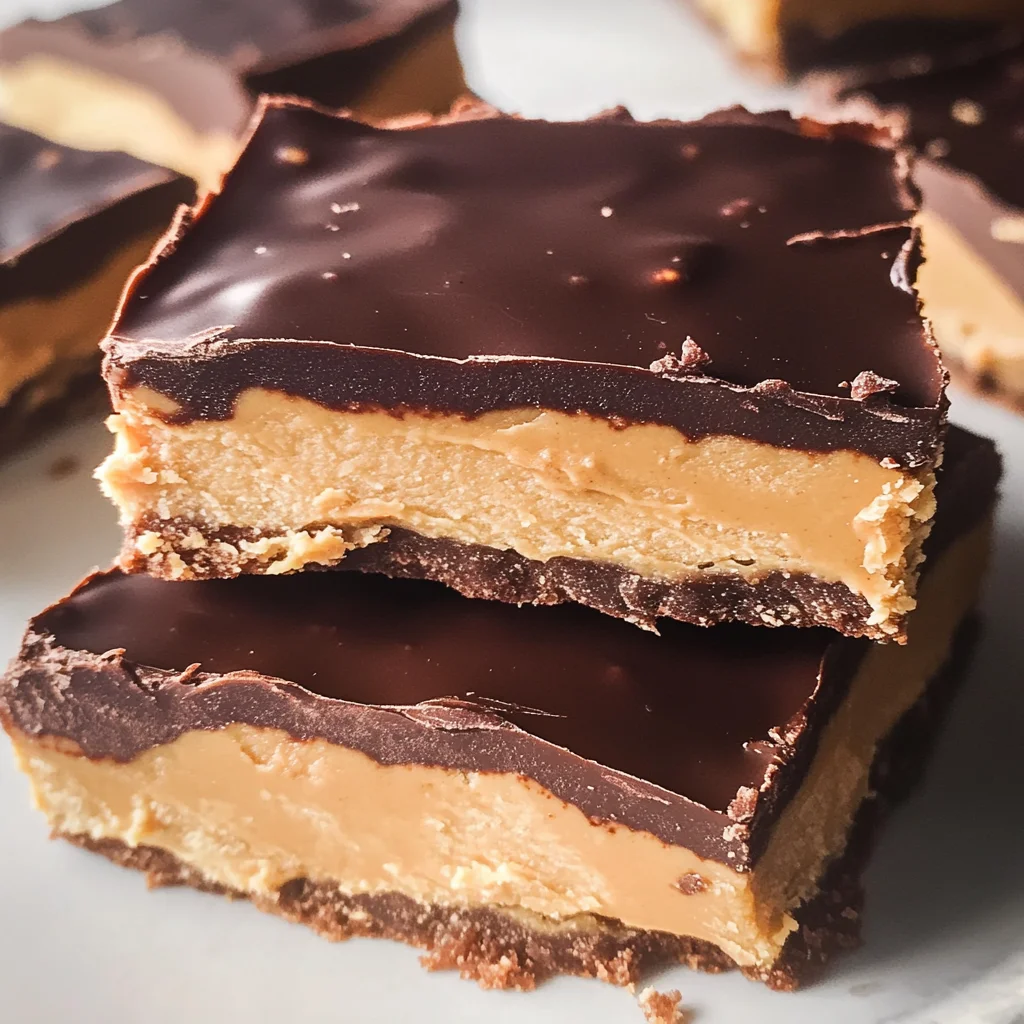
Buckeye Bars
Indulge in the delightful simplicity of Buckeye Bars, a no-bake dessert that combines the rich flavors of creamy peanut butter and smooth chocolate in an easy-to-make treat. Perfect for any occasion, whether it’s a family gathering, birthday celebration, or simply a sweet pick-me-up after a long day, these bars are sure to please both kids and adults alike. With just a handful of ingredients and minimal preparation time, you can whip up this decadent dessert that can be made ahead and chilled until ready to serve. Each bite offers a harmonious balance of textures and flavors, making these layered squares an instant favorite!
- Prep Time: 15 minutes
- Cook Time: None
- Total Time: 0 hours
- Yield: Approximately 24 servings 1x
- Category: Dessert
- Method: No-Bake
- Cuisine: American
Ingredients
- 8 tablespoons salted sweet cream butter (softened)
- 3 cups creamy peanut butter
- 4 cups powdered sugar
- 12 ounces semi-sweet chocolate chips
- 2 tablespoons vegetable oil
- 2 teaspoons pure vanilla extract
Instructions
- In a large mixing bowl, combine softened butter, peanut butter, powdered sugar, and vanilla extract. Mix until smooth.
- Spread the peanut butter mixture evenly into a greased 9×13 inch pan.
- In a microwave-safe bowl, melt chocolate chips with vegetable oil in 30-second intervals until smooth.
- Pour the melted chocolate over the peanut butter layer and spread evenly.
- Refrigerate for at least two hours or until firm.
- Cut into squares and serve.
Nutrition
- Serving Size: 1 serving
- Calories: 200
- Sugar: 15g
- Sodium: 100mg
- Fat: 12g
- Saturated Fat: 4g
- Unsaturated Fat: 8g
- Trans Fat: 0g
- Carbohydrates: 21g
- Fiber: 1g
- Protein: 4g
- Cholesterol: 10mg