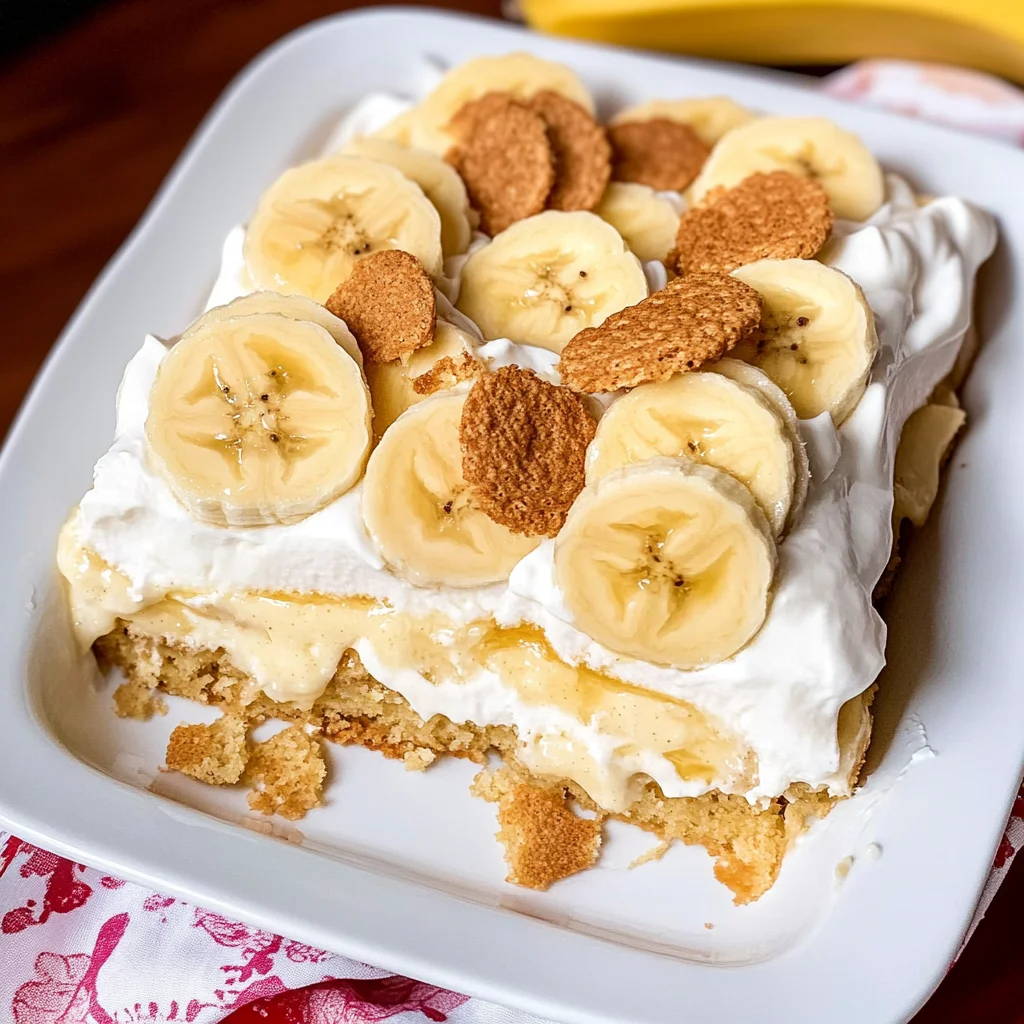
Layered Banana Pudding
If you’re looking for a dessert that brings smiles and sweet memories, then you’ve found it with this Layered Banana Pudding recipe! This delightful treat is a staple in many homes, especially in the South. It’s creamy, dreamy, and oh-so-delicious, making it a favorite for family gatherings and weeknight dinners alike. Best of all, it’s super simple to whip up, so you can spend less time in the kitchen and more time enjoying the company of your loved ones.
Layered Banana Pudding isn’t just a dessert; it’s a celebration on a plate. Whether you’re hosting a party or just craving something sweet after dinner, this recipe is sure to impress. Plus, who doesn’t love layers of fluffy pudding, fresh bananas, and crunchy Nilla wafers? Let’s dive into why you’ll adore this classic!
Why You’ll Love This Recipe
- Quick to prepare: With just 30 minutes of prep time, you can have this tasty dessert ready to chill in no time!
- Family-friendly: Kids and adults alike will enjoy digging into this delicious layered treat. It’s pure comfort food!
- Make-ahead convenience: This dessert tastes even better after sitting in the fridge for a few hours (or overnight!), making it perfect for meal prep.
- Irresistible flavor: Creamy pudding paired with sweet bananas creates an explosion of flavor that will leave everyone wanting more.
- Flexible options: You can easily customize the recipe to suit your taste or dietary needs!
Ingredients You’ll Need
Let’s gather our simple, wholesome ingredients for this Layered Banana Pudding! Each component comes together beautifully to create that creamy goodness we all love.
For the Pudding Base
- 8 ounce block cream cheese (softened to room temperature)
- 14 ounce can of sweetened condensed milk
- 5 ounce package of instant vanilla pudding mix
- 2 cups milk
- 2 teaspoons vanilla extract
- 8 ounce tub of Cool Whip whipped topping (thawed)
For the Layers
- 12 ounce box of Nilla wafers
- 5-7 bananas (peeled and sliced into coins)
Variations
This Layered Banana Pudding recipe is wonderfully flexible! Feel free to get creative with these fun variations:
- Add some crunch: Consider mixing in some chopped nuts like pecans or walnuts between the layers for extra texture.
- Change up the flavor: Use chocolate pudding mix instead of vanilla for a rich twist that chocolate lovers will adore.
- Incorporate other fruits: Swap out some banana slices for strawberries or blueberries for a burst of color and flavor!
- Try different toppings: Instead of just Nilla wafers on top, sprinkle some crushed graham crackers or toasted coconut for added flair.
How to Make Layered Banana Pudding
Step 1: Prepare the Creamy Base
In a large bowl, beat the cream cheese with an electric mixer on medium speed until smooth and fluffy. This step is crucial because it ensures there are no lumps in your pudding base. A fluffy texture makes for an airy finished product!
Step 2: Mix in Sweetness
Add in the sweetened condensed milk, pudding mix, milk, and vanilla extract. Mix until everything is combined well. The sweetness from the condensed milk balances perfectly with the cream cheese—trust me; you’ll want to taste this mixture as you go!
Step 3: Fold in Whipped Topping
Stir in half of the whipped topping gently into your creamy base until incorporated. This step adds lightness and enhances that delightful fluffiness we’re aiming for.
Step 4: Start Layering
Line a 9 x 13 baking dish with one layer of Nilla Wafer cookies. Top with half of the banana slices. These cookies provide that signature crunch we love!
Step 5: Build More Layers
Spread half of your pudding mixture on top of the bananas and add another layer of Nilla wafers. Repeat these layers—bananas followed by pudding—ending with pudding on top. Each layer builds flavor and creates visual appeal.
Step 6: Chill Out!
Cover your dish and refrigerate for at least 4 hours or overnight if possible. Chilling allows all those flavors to meld together beautifully while giving the dessert its signature creamy consistency.
Step 7: Final Touches Before Serving
Remove from refrigerator and add remaining Nilla Wafers along with fresh banana slices before serving. This last step makes your dessert look inviting and fresh—perfect for impressing guests!
Now you’re all set to enjoy this fabulous Layered Banana Pudding! It’s sure to become a cherished favorite at your table too!
Pro Tips for Making Layered Banana Pudding
Making the perfect layered banana pudding is all about the little details! Here are some pro tips to ensure your dessert turns out beautifully every time.
- Use ripe bananas: Ripe bananas have a sweeter flavor and a softer texture, which makes them more enjoyable in your pudding layers. Look for bananas that are yellow with a few brown spots for the best taste.
- Chill properly: Allowing your pudding to chill for at least 4 hours (or overnight) helps the flavors meld together and enhances the creamy texture. This step is crucial for achieving that perfect consistency!
- Layer carefully: For an aesthetically pleasing presentation, be gentle when layering your ingredients. This not only looks beautiful but also ensures that each bite gets a bit of everything—bananas, cream, and cookies.
- Whip it right: Make sure your Cool Whip is fully thawed before folding it into the pudding mixture. This will create a light and airy texture that contrasts nicely with the heavier components of the dish.
- Add a twist: Feel free to experiment by adding crushed nuts or a sprinkle of cinnamon between layers for an extra layer of flavor. It adds a delightful crunch and warmth that complements the sweetness of the bananas.
How to Serve Layered Banana Pudding
Presenting your layered banana pudding can turn this classic dessert into an eye-catching centerpiece at any gathering! Consider these ideas to elevate its appearance and enjoyment.
Garnishes
- Fresh mint leaves: A few sprigs of mint add a pop of color and freshness, balancing the sweetness of the pudding.
- Chocolate shavings: A light sprinkle of chocolate shavings on top brings an indulgent touch that chocolate lovers will appreciate.
- Caramel drizzle: Drizzling caramel sauce over individual servings adds richness and an appealing visual contrast against the creamy layers.
Side Dishes
- Fruit salad: A light fruit salad made with seasonal fruits complements the richness of banana pudding while adding refreshing flavors.
- Vanilla ice cream: Pairing your banana pudding with a scoop of vanilla ice cream creates a delightful temperature contrast—warm versus cool—and adds extra creaminess.
- Sweet tea: No Southern meal is complete without sweet tea! The sweetness pairs beautifully with your dessert, making it feel even more indulgent.
- Lemon bars: These provide a zesty brightness that cuts through the creaminess of banana pudding, creating a balanced dessert table.
Enjoy making this delicious layered banana pudding recipe, and don’t forget to share it with friends and family—they’re sure to love it as much as you do!
Make Ahead and Storage
This layered banana pudding recipe is perfect for meal prep! You can make it in advance, allowing the flavors to meld beautifully while saving time on busy days.
Storing Leftovers
- Store any leftovers in an airtight container in the refrigerator.
- Consume within 3-4 days for optimal freshness.
- Avoid placing bananas on top until serving to prevent browning.
Freezing
- Unfortunately, freezing this dessert isn’t recommended due to the texture changes in the pudding and whipped topping.
- If you must freeze, layer without bananas and whipped topping; add those fresh upon thawing.
Reheating
- There’s no need to reheat as this dessert is best served chilled.
- Simply remove from the refrigerator and enjoy cold!
FAQs
Here are some frequently asked questions about Layered Banana Pudding:
Can I use fresh bananas in Layered Banana Pudding?
Absolutely! Fresh bananas add a delightful flavor and texture. Just slice them right before layering to keep them from browning.
How long can I store Layered Banana Pudding?
You can store Layered Banana Pudding in the refrigerator for 3-4 days. Just remember to add fresh banana slices before serving!
Can I substitute Nilla Wafers in Layered Banana Pudding?
Yes, you can use other cookies like vanilla wafers or even graham crackers for a different twist. Just make sure they provide a similar texture!
What can I use instead of Cool Whip in Layered Banana Pudding?
If you’re looking for a non-dairy option, consider using a coconut whipped topping or homemade whipped cream. Both work well!
Final Thoughts
I hope you find joy in making this luscious layered banana pudding! It’s not just a dessert; it’s a delightful treat that brings comfort and smiles to any gathering. Enjoy every creamy bite, and don’t hesitate to share your own twists on this classic recipe. Happy cooking!
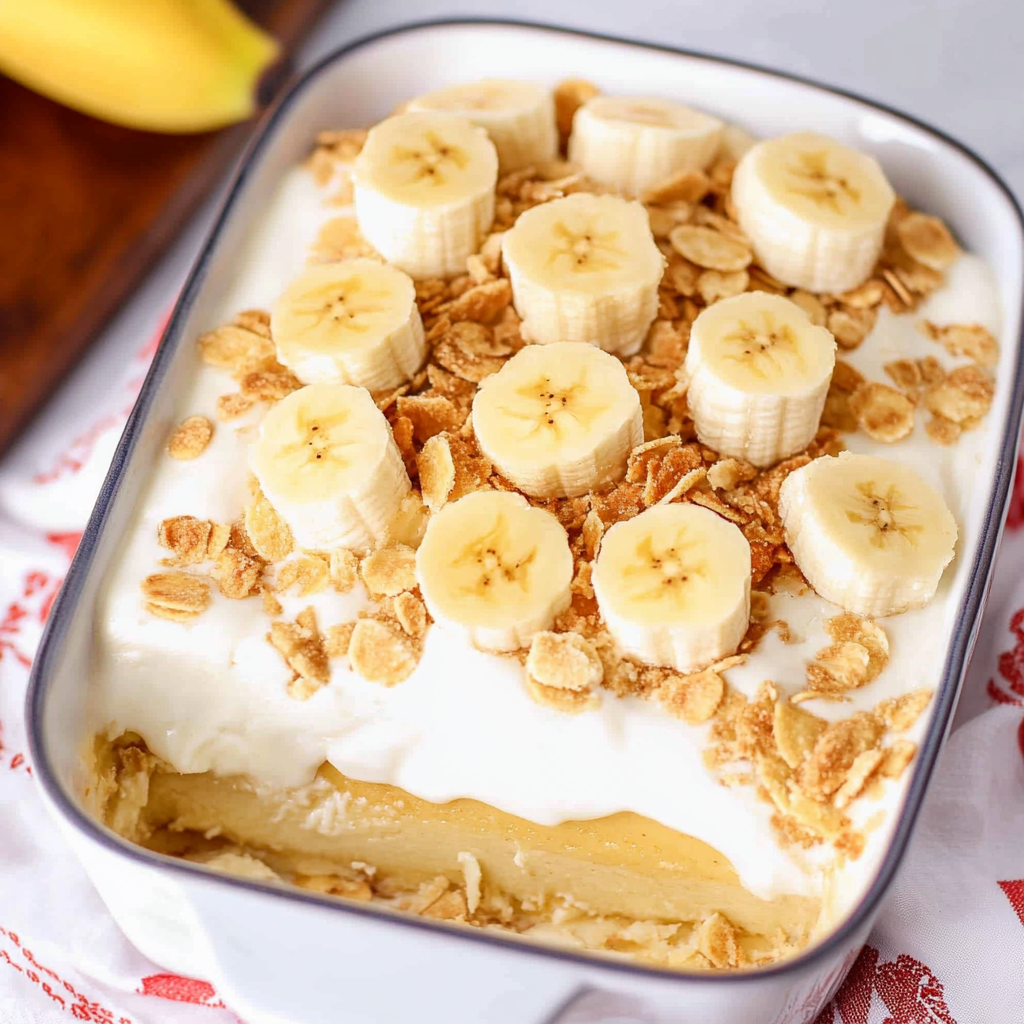
Layered Banana Pudding
Indulge in the delightful layers of our Layered Banana Pudding, a classic dessert perfect for any occasion. This creamy treat combines fluffy pudding, fresh banana slices, and crunchy Nilla wafers to create a nostalgic dish that brings smiles to all. With just 30 minutes of prep time, you can whip up this easy no-bake dessert, making it ideal for family gatherings or weeknight dinners. The best part? It’s make-ahead friendly, allowing the flavors to meld beautifully while you spend more time enjoying with your loved ones. Treat yourself and your guests to this comforting sweet dish that’s sure to impress!
- Prep Time: 30 minutes
- Cook Time: None
- Total Time: 0 hours
- Yield: Approximately 12 servings 1x
- Category: Dessert
- Method: No-bake
- Cuisine: American
Ingredients
- 8 oz cream cheese (softened)
- 14 oz sweetened condensed milk
- 5 oz instant vanilla pudding mix
- 2 cups milk
- 2 tsp vanilla extract
- 8 oz Cool Whip (thawed)
- 12 oz Nilla wafers
- 5–7 bananas (sliced)
Instructions
- In a large bowl, beat the softened cream cheese until smooth.
- Mix in sweetened condensed milk, pudding mix, milk, and vanilla until combined.
- Gently fold in half of the thawed Cool Whip.
- Layer Nilla wafers at the bottom of a 9×13 baking dish followed by half of the banana slices.
- Spread half of the pudding mixture over the bananas and repeat layers, ending with pudding on top.
- Cover and refrigerate for at least 4 hours or overnight.
- Before serving, add remaining Nilla wafers and banana slices on top.
Nutrition
- Serving Size: 1 cup (240g)
- Calories: 290
- Sugar: 30g
- Sodium: 180mg
- Fat: 13g
- Saturated Fat: 8g
- Unsaturated Fat: 4g
- Trans Fat: 0g
- Carbohydrates: 38g
- Fiber: 1g
- Protein: 4g
- Cholesterol: 35mg