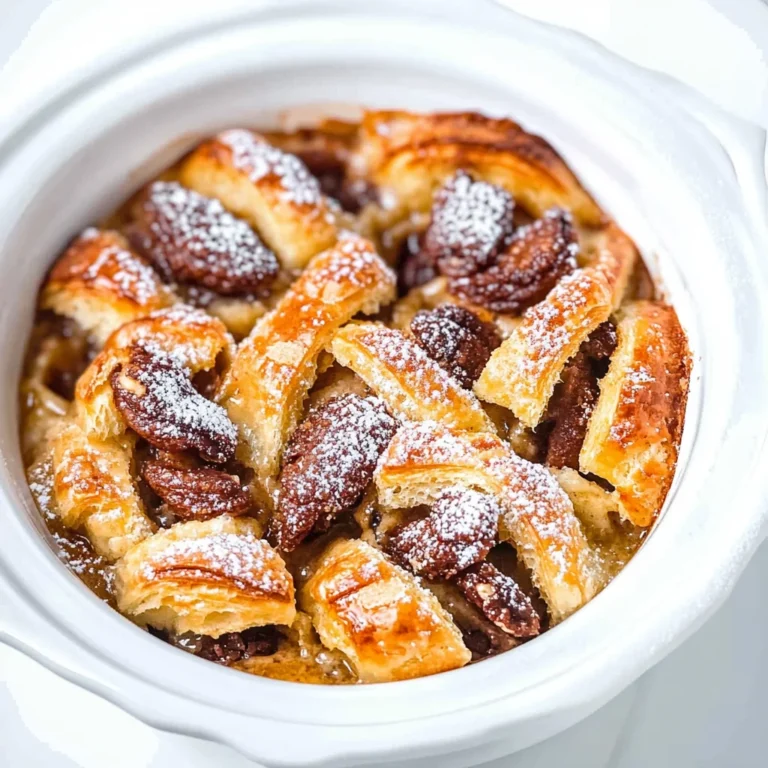
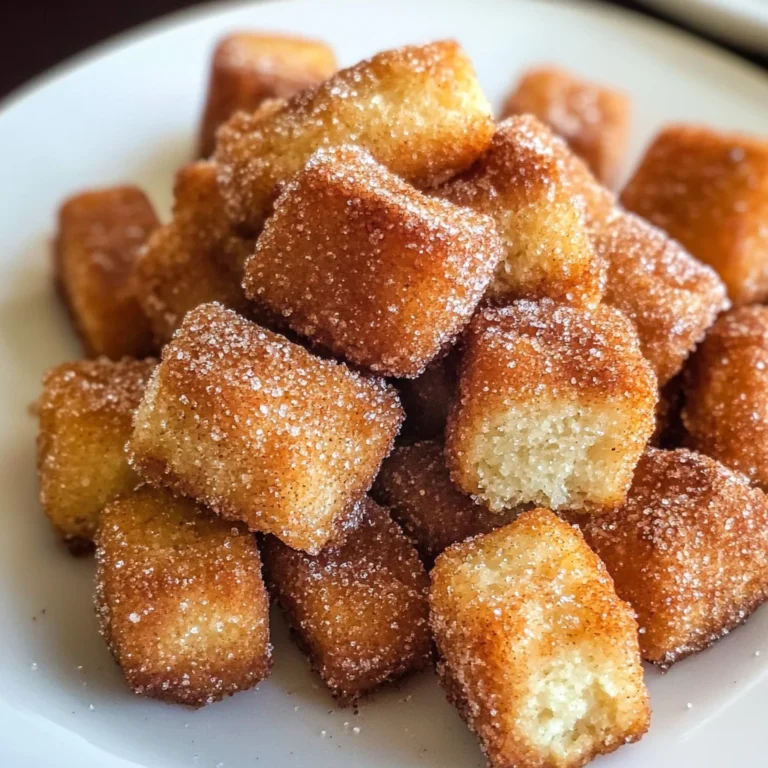
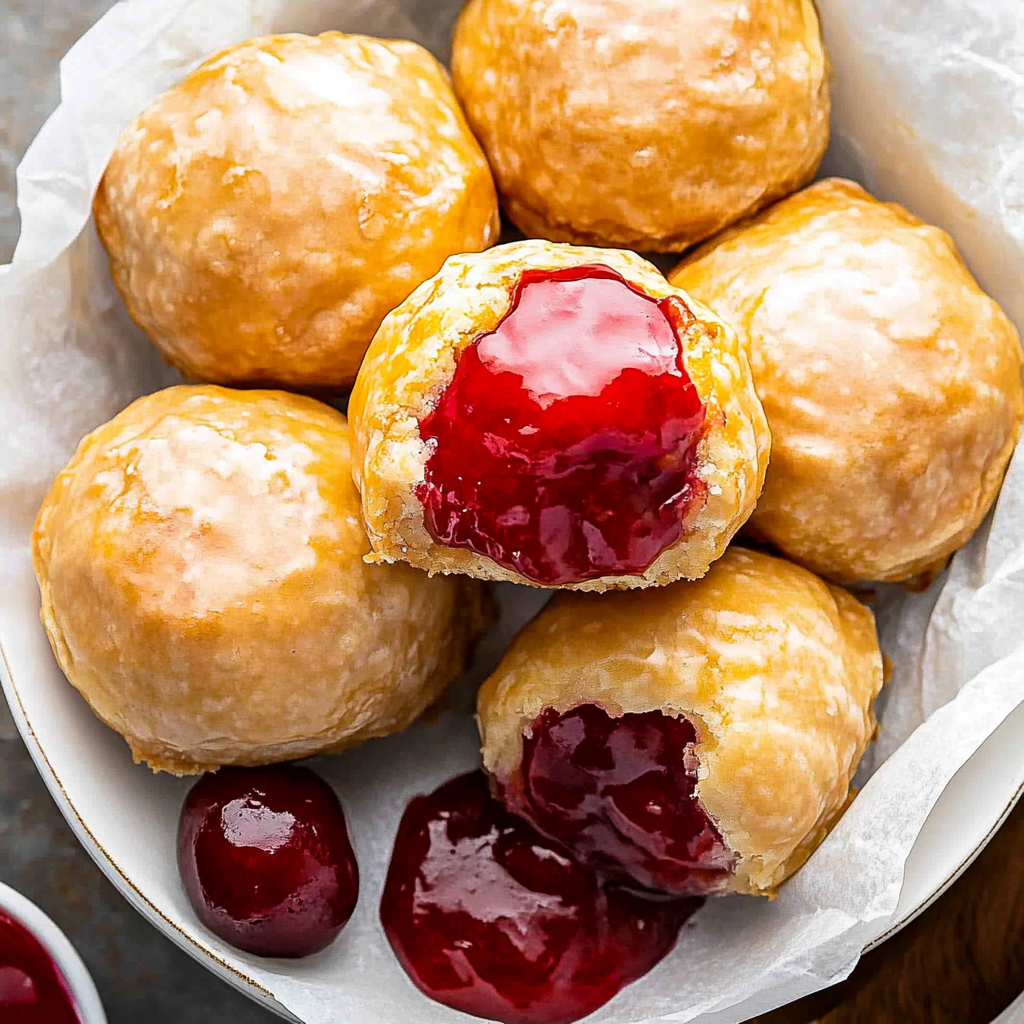
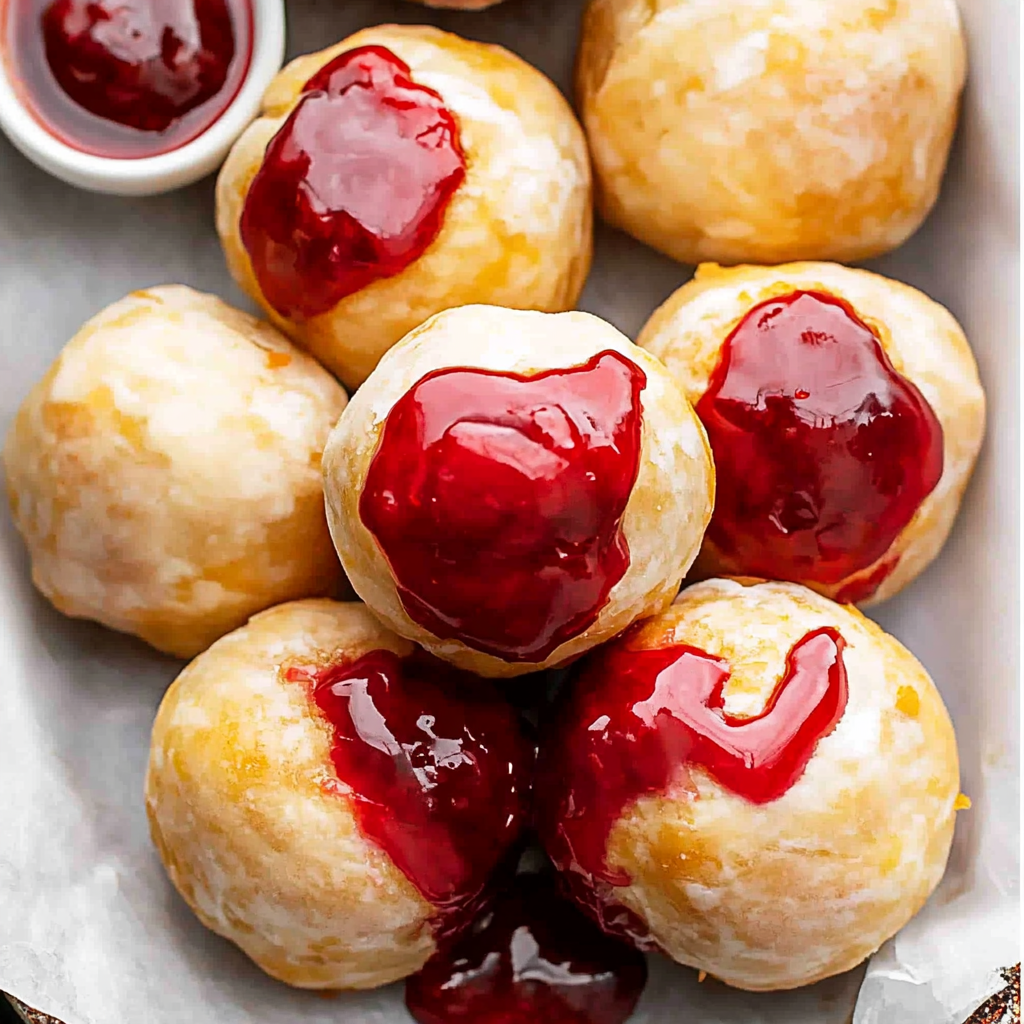
Cherry Pie Bombs
If you’re looking for a delightful treat that’s easy to make and absolutely delicious, you’ve come to the right place! Cherry Pie Bombs are a favorite in my household because they combine the classic taste of cherry pie with a fun, bite-sized twist. These little gems come together quickly, making them perfect for busy weeknights or family gatherings. Plus, who can resist that warm cherry filling wrapped in flaky goodness? They are truly a comfort food that brings smiles all around.
Whether you’re whipping them up for a cozy family dessert or sharing them at your next get-together, these Cherry Pie Bombs are sure to impress. Let’s dive into why you’ll love making these sweet treats!
Why You’ll Love This Recipe
- Quick and Easy: With just a handful of ingredients and minimal prep time, you can have these delights ready in no time.
- Perfectly Portable: These mini pies are great for on-the-go snacking or serving at parties without the fuss.
- Family-Friendly Fun: Kids love helping shape the bombs and making their own creations with the filling!
- Irresistible Flavor: The combination of buttery crust with luscious cherry filling is simply unbeatable.
- Make-Ahead Convenience: You can prepare them ahead of time and air fry them when you’re ready to serve!
Ingredients You’ll Need
To whip up these Cherry Pie Bombs, you’ll only need some simple, wholesome ingredients that you might already have in your kitchen. Gather these lovely items:
For the Dough
- 1 can (8-count) Pillsbury Grand biscuits (not flaky layers)
For the Filling
- 1 cup (255 g) cherry pie filling
For the Topping
- ½ cup (1 stick / 113 g) unsalted butter (melted)
- 2 cups (250 g) confectioners’ sugar
- 3-4 tablespoons whole milk (room temperature)
Now that you have everything ready, let’s jump into the variations!
Variations
This recipe is quite flexible, allowing you to get creative with flavors and fillings. Here are some fun variations to consider:
- Try Different Fillings: Swap out the cherry pie filling for blueberry, apple, or even chocolate hazelnut spread for a new twist!
- Add Spices: Mix in some cinnamon or nutmeg with your cherry filling for an extra flavor boost.
- Experiment with Icing: Instead of a glaze, top your bombs with melted chocolate or sprinkle with powdered sugar before serving.
- Make Them Savory: Use cream cheese and herbs as a filling for a savory version—perfect as an appetizer!
How to Make Cherry Pie Bombs
Step 1: Prepare the Dough
Start by removing the biscuits from the can. Each biscuit needs to be peeled apart so you can form two layers. Press each layer into a 4-inch circle. This step is crucial as it ensures that your dough is thin enough to hold the cherry filling while still being sturdy.
Step 2: Add the Filling
Spoon about 1 tablespoon of cherry pie filling into the center of each circle. Don’t be shy! A generous scoop will ensure every bite is packed with flavor.
Step 3: Seal Your Bombs
Use your fingers to fold the sides together and pinch them closed tightly. Shaping them into balls helps create an even cook throughout and keeps all that delicious filling inside.
Step 4: Butter Them Up
Brush both the tops and bottoms of your bombs with melted butter. This not only adds flavor but also helps achieve that stunning golden-brown color when air frying.
Step 5: Air Fryer Prep
Spray your air fryer basket with nonstick cooking spray. This prevents sticking and ensures easy cleanup after frying.
Step 6: Air Fry Your Treats
Working in batches, place your bombs in the air fryer basket about 2 inches apart. Air fry at 330°F for 7-8 minutes until they turn golden brown. The smell will drive everyone crazy in the best way!
Step 7: Cool and Glaze
Once cooked, remove your bombs from the air fryer and let them cool slightly while preparing the glaze.
Step 8: Make Your Glaze
In a medium mixing bowl, combine confectioners’ sugar and milk; whisk until smooth. Adjust milk quantity until you reach your desired consistency.
Step 9: Glaze Those Bombs
Dip or roll each bomb in the glaze then place them on a wire rack over a baking sheet for easy cleanup.
Step 10: Serve and Enjoy!
Let the glaze firm up before serving. These Cherry Pie Bombs are best enjoyed warm or at room temperature—perfect for sharing with friends or family!
Now you’re set to enjoy these delightful bites! Happy baking!
Pro Tips for Making Cherry Pie Bombs
Making Cherry Pie Bombs is a fun and rewarding experience, and these tips will help you achieve the perfect bite-sized treat every time!
- Use Room Temperature Ingredients: Starting with room temperature ingredients, like the butter and milk for the glaze, helps everything blend together smoothly, ensuring your glaze is delectably creamy.
- Seal Well: Make sure to pinch the dough tightly around the filling. This prevents any cherry filling from leaking out during cooking, resulting in perfectly contained flavor bursts.
- Even Sizing: Aim for uniform 4-inch circles when rolling out the biscuits. This ensures even cooking, helping all your pie bombs come out golden brown and delicious.
- Don’t Overcrowd the Air Fryer: Cooking in batches allows for proper air circulation, leading to better crispiness. Overcrowding can result in uneven cooking and soggy bottoms.
- Experiment with Fillings: While cherry is delightful, feel free to try other fruit fillings or even chocolate. This versatility allows you to personalize your pie bombs to suit any palate!
How to Serve Cherry Pie Bombs
Cherry Pie Bombs are not only delicious but also visually appealing! Here are some ideas on how to present them beautifully for your family or guests.
Garnishes
- Powdered Sugar: A light dusting of powdered sugar adds an elegant touch and enhances the sweetness of each bomb.
- Fresh Cherries: Top each pie bomb with a fresh cherry or two for a pop of color and freshness that ties back to the filling.
- Whipped Coconut Cream: A dollop of whipped coconut cream on the side creates a creamy contrast that complements the tart cherries brilliantly.
Side Dishes
- Vanilla Ice Cream: The classic pairing of warm desserts with cold ice cream enhances every bite of your Cherry Pie Bombs.
- Fruit Salad: A light fruit salad made with seasonal fruits provides a refreshing balance to the richness of the pie bombs.
- Yogurt Parfait: Layers of yogurt, granola, and berries offer a healthy option that pairs well with the sweetness of cherry.
- Chocolate-Dipped Strawberries: These sweet treats add a touch of indulgence and make for an attractive addition alongside your pie bombs.
With these serving suggestions and pro tips, you’re all set to impress everyone at your next gathering with these delightful Cherry Pie Bombs! Enjoy sharing this sweet treat!
Make Ahead and Storage
These Cherry Pie Bombs are not just a delightful treat; they’re also fantastic for meal prep! You can whip them up in advance and have a sweet, satisfying dessert ready whenever you need it.
Storing Leftovers
- Store any leftover pie bombs in an airtight container at room temperature for up to 2 days.
- If you prefer them chilled, you can keep them in the refrigerator for up to a week.
Freezing
- To freeze, place the cooled cherry pie bombs in a single layer on a baking sheet and freeze until solid.
- Once frozen, transfer them to a freezer-safe bag or container. They can last up to 3 months in the freezer.
Reheating
- For best results, reheat frozen pie bombs in the air fryer at 330°F for about 5-6 minutes or until warmed through.
- If reheating from the refrigerator, simply warm them in the air fryer for about 3-4 minutes.
FAQs
You might have some questions about these delicious Cherry Pie Bombs. Here are answers to common inquiries!
Can I use fresh cherries instead of cherry pie filling for Cherry Pie Bombs?
Absolutely! Just make sure to pit and chop fresh cherries, then mix them with a bit of sugar and cornstarch to create a filling similar to cherry pie filling.
How do I prevent my Cherry Pie Bombs from leaking during cooking?
To avoid leaks, ensure that you seal the edges tightly when pinching them closed. Additionally, don’t overfill them with cherry pie filling—1 tablespoon is usually just right!
Can I make Cherry Pie Bombs ahead of time?
Yes! You can prepare the bombs ahead of time, refrigerate or freeze them, and then simply bake or air fry when you’re ready to enjoy them.
What is the best way to serve Cherry Pie Bombs?
Cherry Pie Bombs are best served warm with a drizzle of glaze on top. Pairing them with vanilla ice cream or whipped topping makes for an extra special treat!
Final Thoughts
I hope you enjoy making these delightful Cherry Pie Bombs as much as I do! They’re perfect for gatherings, family dinners, or simply satisfying your sweet tooth. Remember that they’re not just easy to prepare but also allow for creativity if you want to experiment with different fillings. Enjoy every bite and happy baking!
Cherry Pie Bombs

If you’re in search of a delightful treat that’s quick to make and utterly delicious, Cherry Pie Bombs are the answer! These bite-sized wonders combine the classic taste of cherry pie with a playful twist, making them perfect for family gatherings or cozy nights at home. With a warm cherry filling encased in flaky dough, they’re sure to bring smiles all around. Easy to prepare and fun to customize, these treats will satisfy your sweet cravings and impress your guests.
- Prep Time: 15 minutes
- Cook Time: 8 minutes
- Total Time: 23 minutes
- Yield: About 8 servings 1x
- Category: Dessert
- Method: Frying
- Cuisine: American
Ingredients
- 1 can (8-count) refrigerated biscuits (not flaky layers)
- 1 cup cherry pie filling
- ½ cup unsalted butter (melted)
- 2 cups confectioners' sugar
- 3–4 tablespoons whole milk
Instructions
- Preheat your air fryer and prepare the dough by peeling apart each biscuit and pressing them into 4-inch circles.
- Spoon 1 tablespoon of cherry pie filling into the center of each circle.
- Fold the sides together to seal tightly and form balls.
- Brush with melted butter for added flavor and golden color.
- Air fry at 330°F for 7-8 minutes until golden brown.
- Cool slightly before glazing with a mixture of confectioners' sugar and milk.
Nutrition
- Serving Size: 1 bomb
- Calories: 180
- Sugar: 9g
- Sodium: 180mg
- Fat: 8g
- Saturated Fat: 5g
- Unsaturated Fat: 2g
- Trans Fat: 0g
- Carbohydrates: 25g
- Fiber: 0g
- Protein: 2g
- Cholesterol: 15mg